This article's title is conjectural.
Any name given in official media is eligible to become the title of the article.
The current title is not an official name.
The "Area 8 Ruins" is an unnamed room featured in Metroid II: Return of Samus and Metroid: Samus Returns.
Description
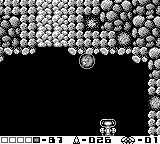
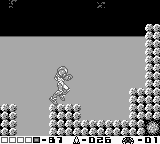
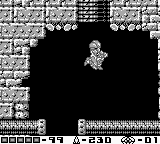
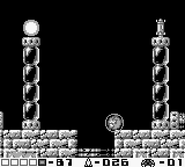
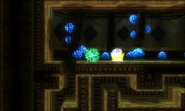
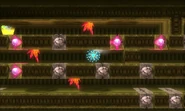
This room is located in Area 8 of SR388, and is explored during Samus Aran's mission to exterminate the Metroids. This tall, wide-open room[1] is one of the largest rooms in Area 8. In Samus Returns, this single room is actually comprised of five rooms from the original Return of Samus, increasing its scope in the remake.
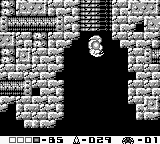
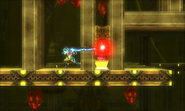
There are two main sections of this room. The lower half is a natural cavern full of wide-open space. The upper half, described as a labyrinthine room[2], is composed of narrow and claustrophobic architecture of the final set of Chozo ruins, acting as the entrance into the Metroid nest above.
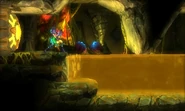
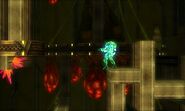
Samus enters the room through a short corridor with a Save Station and a small pool of yellow liquid. Space Jumping upward through a narrow passage will enter the wide-open area, which has a massive lake of yellow liquid pooling at the bottom. In Return of Samus, it can be tricky to jump out of this viscous liquid; in Samus Returns, the lake has been moved into the background, which is now detailed with several waterfalls of yellow liquid.
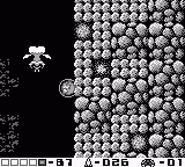
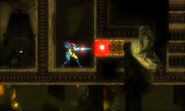
In Return of Samus, the wide-open area is populated by Septoggs, the only non-Metroid inhabitants of Phase 9 and the last such creatures Samus will encounter during her mission. These harmless creatures are positioned in places that can help Samus ascend the room, such as directly beneath each of the three entrances to the Chozo ruins. The labyrinthine room itself is divided into three chambers: one contains a Big Energy Ball and Missile Battery; one leads to a destroyed Chozo Statue with the Ice Beam; and one leads into the Metroid nest. The first two chambers are particularly useful, since Samus has the opportunity to restock on Energy and Missiles after the grueling battles against the Omega Metroids in Phase 8, and switch out her current beam for the required Ice Beam without needing to backtrack to Phase 7. Samus can also return to the ruins through a secret exit in the Queen's nest if she needs to recharge after exterminating the Metroid larvae.
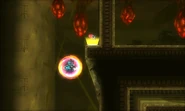
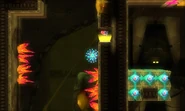
In Samus Returns, the room is densely populated by a combination of tough creatures and resilient robots. The wide-open area takes up less room compared to the labyrinthine room, which (true to its description) is a winding maze of multiple sections and subchambers, most of which lead to expansions. With yellow goo, spikes, and red plants in addition to the many enemies, it will take much of Samus's skillset to navigate this maze and reach the Metroid nest. Similar to the Big Energy Ball and Missile Battery in the original game, the ruins contain an Energy Recharge Station and Ammo Recharge Station. As Samus ascends the room, she can destroy two Pull Blocks to open shortcuts back down. At various points, large metallic structures in the background start to break down and collapse from deterioration; however, this does not affect gameplay and only serves as background animations.
Connected rooms
In both games, the left side of the Save Station's corridor connects (via Beam Door in Samus Returns) to a room with small pools of yellow liquid. The top left exit of the labyrinthine room connects (via Beam Door in Samus Returns) to a vertical room leading into the Metroid nest.
In Return of Samus, the middle chamber of the labyrinthine room connects to a room containing a broken Chozo Statue and the Ice Beam.
Inhabitants
Return of Samus
- 6 Septoggs
Samus Returns
- 2 Autoads
- 4 Black Autoads
- 3 Black Autracks
- 2 Black Gravitts
- 4 Glow Flies
- 6 Gunzoos
- 12 Stronger Gulluggs
Items
Samus Returns
- Missile Tank
- On the left side of the room, a Missile Tank can be found in a narrow shaft patrolled by a Gunzoo.
- Missile Tank
- In a section of the labyrinthine room covered with yellow goo and spikes, a Bomb will destroy a Bomb Block and reveal a Missile Tank.
- Missile Tank
- In the upper half of the labyrinthine room, Samus must use the Grapple Beam through a narrow opening in order to remove a Pull Block, and then double back from the other side to access the exposed Missile Tank.
- Super Missile Tank
- The section of the labyrinthine room directly above the Energy Recharge Station is a maze of spikes, Pit Blocks, and Bomb Blocks. Navigating the maze leads to a Super Missile Tank.
- Power Bomb Tank
- The upper-right area of the labyrinthine room is a maze infested with red plants and Black Gravitts. Navigating to the top of the maze leads to the Power Bomb Tank.
Official data
Metroid: Samus Returns Official Guide
- WALKTHROUGH (pg. 195)
- "Jump straight up the middle of the room. It's divided into two parts: the lower area which is nothing but open space; and the upper area, which is a twisting, turning maze of corridors and items. It's a challenge to traverse, so be prepared."
Trivia
- In Samus Returns, the room's cavern is where Metroid Nest starts playing. In Return of Samus, the theme does not start playing until Samus enters the leftmost chamber of the ruins.
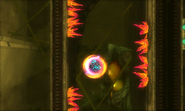
- In Samus Returns, a narrow spike-lined shaft in the labyrinthine room is very reminiscent of a particular room in Phase 4 in Return of Samus, which had been given a more elaborate redesign in Samus Returns.
Gallery
References
- ^ Metroid: Samus Returns Official Guide pg. 195: "Note the Gunzoo upon entering a tall, wide-open room."
- ^ Metroid: Samus Returns Official Guide pg. 197: "You find the door out of this labyrinthine room there."
| Rooms on SR388 | |
|---|---|
| Surface | "Landing Site" |
| Area 1 | Vertical chamber • Power Up Cavern • Arena area of Chozo base |
| Area 2 | Arachnus' room • Alpha Metroid chamber • Alpha's chamber |
| Area 3 | Three tower corridors |
| Area 4 | "Octroll Lake" |
| Area 5 | Water-filled room (lower/middle) • Grand Cavern • Zeta's chamber • Dark Chamber |
| Area 6 | "Diggernaut arena" |
| Area 7 | Chozo Tower • Final Omega's chamber |
| Area 8 | "Final Purple Liquid Tunnel" • Liquid-filled hall • "Area 8 Ruins" • "Metroid Nest Access" • "First Metroid passage" • "Queen's nest access" • Queen's nest |
| Other Rooms | Return of Samus: Phase 1 • 2 • 3 • 4 • 5 • 6 • 7 • 8 • 9 Samus Returns: Surface • Area 1 • 2 • 3 • 4 • 5 • 6 • 7 • 8 |

