This article's title is conjectural.
Any name given in official media is eligible to become the title of the article.
The current title is not an official name.

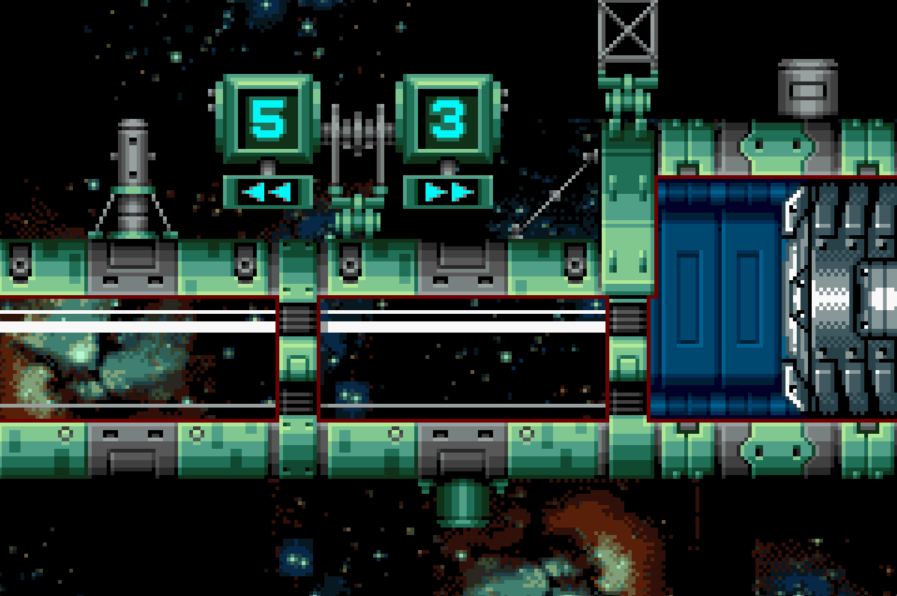
The tunnel from Sector 3 (PYR) leading to Sector 5 (ARC). An item is hidden in a small alcove above the door.
The "B.S.L Station Transport Tubes" are tunnels Samus Aran can use to move between each of the six sectors onboard the Biologic Space Laboratories research station. They appear as multiple rooms in Metroid Fusion.
Description[]
Transport tubes are located around the B.S.L research station. They are green horizontal glass tubes that overlook a view of space. Their primary purpose is to connect two sectors together, allowing travel between sectors without having to go through Elevators 1-6 on the Main Deck. Many, if not all of them, are blocked by Screw Attack Blocks and can therefore only be properly accessed by Samus once has the Screw Attack.
Storywise, these tubes are not vastly important, and mainly serve as important locations for Samus should she attempt to gather 100% items. Using the tubeway allows Samus to bypass all sectors' Navigation Rooms, allowing for 100% item completion even in a non-cleared game (the doors to the other sectors lock once Samus has received her final orders to crash the station into SR388). One Tubeway contains a Power Bomb Expansion hidden above a door.
If one takes the diagram of the station (shown during Navigation Room briefings) into account, it is possible that these tubes are what make up the outer ring shown from the outside of the B.S.L research station. Each sector on the diagram shows what its two neighboring sectors are.
Though different from the primary six sectors, the Main Deck's (specifically the Restricted Zone's) airlock area could be considered a tubeway, although this would make it the only one that Samus must pass through to progress. Both are glass tubes overlooking a view of empty space. The Restricted Zone connects to two Sectors: Sector 6 (NOC) and Sector 1 (SRX).
The following table lists where each Sector connects to adjacently (left and right directions are determined when one views the station from the center/Main Deck area):
| Sector | Neighboring Sectors |
|---|---|
| Sector 1 (SRX) | Sector 3 (PYR) (left) Sector 2 (TRO) (right) |
| Sector 2 (TRO) | Sector 1 (SRX) (left) Sector 4 (AQA) (right) |
| Sector 3 (PYR) | Sector 5 (ARC) (left) Sector 1 (SRX) (right) |
| Sector 4 (AQA) | Sector 2 (TRO) (left) Sector 6 (NOC) (right) |
| Sector 5 (ARC) | Sector 6 (NOC) (left) Sector 3 (PYR) (right) |
| Sector 6 (NOC) | Sector 4 (AQA) (left) Sector 5 (ARC) (right) |
Some sectors contain a third, hidden transport area, though these differ from the main tubeways. All of them are plot-relevant:
| Sector | Leads to | Description |
|---|---|---|
| Main Deck (Reactor Silo) | Sector 2 (TRO) | This transport tunnel is a Morph Ball-sized tunnel connecting Sector 2 (TRO) to the Reactor Silo. It is how the overgrown roots of Sector 2 managed to infest and choke the Main Reactor. Samus uses this tunnel to find Nettori, the source of the roots. |
| Sector 5 (ARC) | Sector 4 (AQA) | An underwater transit tunnel Samus uses to leave Sector 5 after obtaining the Gravity Suit. |
| Sector 6 (NOC) | Main Deck (Restricted Zone) | A cave with a Morph Ball tunnel leading to the Restricted Zone. Samus enters this tunnel once she has obtaining the Wave Beam, in an act of defiance after Adam orders her to leave Sector 6 immediately once she has beaten the Security Robot B.O.X. The tunnel will also eventually lead to an elevator leading to Sector 1 (SRX). |
Gallery[]
")
")
")
")
")
")
")
")
")
")
")
| Areas and Rooms of the Biologic Space Laboratories research station | |
|---|---|
Navigation Room • Recharge Station • Save Station • Data Room • Security Room "Sector Main Hall" • "B.S.L Station Transport Tubes" | |
Docking Bays • Quarantine Bay • "Arachnus' chamber" • Habitation Deck • Central Reactor Core • Reactor Silo • "Yakuza's room" • Auxiliary Power Station Operations Deck • Operations Room • Main Elevator Elevators 1-6 • Sub-Zero Containment • Restricted Zone | |
"Elephant Bird's room" • "Neo-Ridley's room" | |
"Zazabi's room" • "Giant root's arena" | |
"B.O.X.'s room (PYR)" • Main Boiler Control room | |
"AQA Maintenance Bay" • Breeding tank • "Serris arena" • Pump Control Unit | |
Electronic junkyard | |
"Nocturnal cavern" • "B.O.X.'s room (NOC)" | |