Corridor No. 4[1], also known as Corridor Four[2] and Brinstar's middle-right corridor[3], is a series of rooms in Brinstar in Metroid and Metroid: Zero Mission. This room is no longer accessible in Super Metroid.
Description[]
Metroid[]
Like much of Brinstar, Corridor No. 4 features a mixture of blue rocky territory and mechanical structures suspended over acid. It consists of three corridors and two vertical shafts. Interestingly, the blue rocks found exclusively in Corridor No. 4 in Metroid are darker and rounder than those found in the rest of Brinstar; this is also seen in the background of Corridor No. 4 in Zero Mission. In Metroid, a small section of the fifth room contains gold terrain like that seen in Corridor No. 5.
The first corridor stretches over a lake of acid, with multiple midair platforms above providing a crossing and/or a way out if Samus falls in. This room is inhabited by Wavers and Zoomers. The second room is a shaft with a fake pit of acid below the floor. Bombing the floor will drop Samus through the acid and down a shaft that is very difficult to escape from, unless she has the Ice Beam and freezes several Rippers and/or Wavers to use as platforms.
The third corridor is much the same as the first, now with a midair obstruction of Fake Blocks in the center of the room, which can be jumped over or shot through. Bombing the floor in the fourth room of will drop Samus Aran through fake acid and into another vertical shaft, leading her to another room containing the Ice Beam. Unlike the second room, this shaft is much more easily escaped due to a high number of platforms in it. The fifth and final room is a much longer corridor stretched over another lake of acid. Near the center is a ceiling composed of metal with two hanging pillars, and an Energy Tank directly underneath.
Zero Mission[]
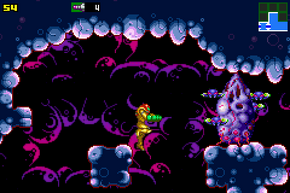
One of the Mellow hives.
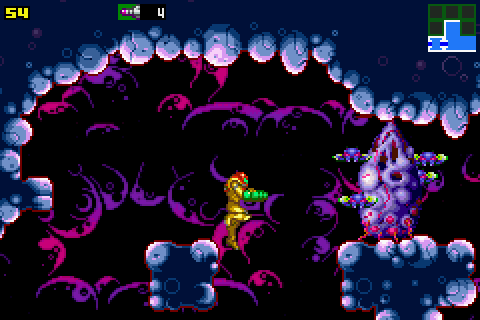
In Zero Mission, the rooms are more developed and consist entirely of blue rock, with no gold, bubble or metal parts, although the hanging pillars in the fifth room remain. The third room in particular has been overhauled, now featuring Mellow hives. The Zoomers and Wavers that previously inhabited the fifth room are replaced with Skrees, and there are now walls of Fake Blocks that must be shot to proceed. If Samus has not killed the Charge Beam Beast yet, it will confront her again at the entrance to the fifth room.
In Zero Mission, the fourth room leads to a Chozo Statue that guides Samus to the Ice Beam's location in Norfair. This is because in the original Metroid, the Ice and Wave Beams could not stack, whereas in the remake they can. Mercifully, the shaft underneath the second room is no longer difficult to escape from, as Fake Block platforms now exist on the left side, and a Missile Tank can be found on the right.
Connecting rooms[]
- Gold-colored shaft (via Red Hatch)
- "Brinstar end shaft" (via Blue Door)
- "Cavernous hall" (Metroid/Zero Mission) (via Blue Door)
Inhabitants[]
Metroid[]
- Second room
- 4 Wavers (green)
- 4 Rippers (2 yellow, 2 red)
- Third room
- 5 Wavers (green)
- 2 Zoomers (1 red, 1 yellow)
- Fourth room
- 2 Wavers (green)
- 4 Rippers (yellow)
- 5 Zoomers (4 yellow, 1 red)
- Fifth room
- 13 Wavers (11 green, 2 blue)
- 5 Zoomers (3 yellow, 2 red)
- 1 Reo (green)
Zero Mission[]
- Second room
- 4 Mellows (first visit)
- Third room
- 3 Hives (first visit)
- Mellows (indefinitely spawned until Hives destroyed)
- Fourth room
- 5 Zoomers
- 1 Ripper
- 5 Parasites
- Fifth room
- 6 Skrees
- Charge Beam Beast (if not defeated previously)
Items[]
- Energy Tank
- In both games, lying on a pedestal above an acid pit in the fifth room.
- Missile Tank (Zero Mission)
- The first tank can be found in the shaft underneath the second room, contained behind a Bomb Block.
- Missile Tank (Zero Mission)
- The second tank can be found in the third room, in a hidden alcove containing one of the Mellow hives.
- Missile Tank (Zero Mission)
- The third can be found in the fourth room, hidden at the base of a wall of Fake Blocks.
- Charge Beam
- Zero Mission only, and only if the Charge Beam Beast has not been previously defeated in Corridor No. 5. Killing the Charge Beam Beast rewards Samus with the Charge Beam, which floats in midair.
Official data[]
Metroid Prime: The Official Nintendo Player's Guide[]
- 004 TANKS FOR THE ENERGY (pg. 128)
- "Your battles with the flying creatures can be brutal, even when you are equipped with Missiles and the Long Beam. You need a larger energy-holding capacity. Cross the gold-colored shaft and hop through another long hall, being sure not to drop into the dangerous liquid below. After a long haul, you'll collect an Energy Tank and double your energy."
- 006 BLAST FOR A BEAM (pg. 129)
- "The room that connects two long tunnels on the right side of Brinstar appears to be flooded with a damaging substance. When you bomb through the rock walkway and drop into the liquid, you'l discover that you can fall through a false floor. Drop to a ledge on the left and fight your way to a red hatch. You'll collect the Ice Beam upgrade on the other side."
Metroid: Zero Mission: The Official Nintendo Player's Guide[]
- 017 INSECT ALERT (pg. 32)
- "After you hit the red hatch with a missile and move into the tunnel that leads you through the middle of Brinstar, you'll encounter swarms of regenerating insects. Hold the L Button to aim diagonally up and fire at the bugs as you run right."
- 018 missile tank (pg. 32)
- "By hopping onto a platform, you'll find one of the sources of the insect invasion - a hive. Hit the hive with beam shots or missiles. Before you move on to the right, jump left to a short ledge, then run left through a hidden passage to another hive and a Missile Tank."
- 019 HIVES ALIVE (pg. 33)
- "The only way to reach the right side of the large chamber is to hop across the upper ledges. As you approach a hive, hit it with all of the firepower that you can muster to clear it and its inhabitants out of the way."
- 020 missile tank (pg. 33)
- "A wall of breakable blocks acts as an easy-to-crumble barrier in the middle of the passage. By destroying the blocks at the base of the wall, you'll reveal another Missile Tank."
- 021 RETURN OF THE CHARGE BEAM BEAST (pg. 33)
- "If you haven't defeated the burrowing creature that holds the Charge Beam, you'll get a second chance on your way to the Normal Bomb upgrade. Hit the creature's open eye three times with missiles to vanquish it."
- 022 energy tank (pg. 33)
- "As you move right, you'll collect an Energy Tank. Every tank gives you the capacity to hold 100 more energy units. There are 12 Energy Tanks."
- 023 BLAST BEFORE YOU LEAP (pg. 33)
- "You'll find more block walls as you amble on to the right. Hit the blocks with beam blasts to clear them away before you leap across the lava.[sic] With the walls gone, you'll have a passage and platforms to get you to Brinstar's far right side."
- 028 A CHOZO SHOWS YOU THE WAY (pg. 35)
- "You'll find a series of bombable blocks in the floor of Brinstar's long central corridor. Clear away the blocks to access a passage that will lead you to a Chozo Statue."
- 029 OPTIONAL UPGRADE (pg. 35)
- "You'll discover a Missile Tank in a short shaft that feeds off the middle passage. While you can collect the item early, it'll be easier to get once you have the Power Grip. Roll off the ledge above the tank and plant a bomb in front of the breakable block. Before the block re-forms, jump onto the ledge again then roll into the hole."
Trivia[]
- Although the yellow liquid seen in Corridor No. 4 is canonically considered acid, the NES manual refers to it as water, and this is reflected in various adaptations of the first game.
- In Victory Techniques for Metroid, Samus is exploring Corridor No. 4 when she is attacked by Wavers and knocked into the deadly water below. After escaping the Wavers, Samus acquires the Energy Tank found in this corridor. Later, she returns to Corridor No. 4 and bombs the floor, falling into the shaft leading to the Ice Beam. The hand-drawn map for the second half of Brinstar includes a warning notice about the trap in the second room.
- In the Captain N: The Game Master comic Money Changes Everything, Kevin and his teammates navigate a Brinstar cavern full of lethal water and Wavers. This description best matches Corridor No. 4, and therefore is possibly intended as a faithful depiction of this room.
Gallery[]
")
")
")
")
")
")
")
")
")
")
References[]
- ^ Metroid manual, pg. 17
- ^ Nintendo Fun Club News, pg. 4
- ^ Metroid: Zero Mission: The Official Nintendo Player's Guide pg. 11