This article's title is conjectural.
Any name given in official media is eligible to become the title of the article.
The current title is not an official name.
"Chozo Shaft East" is a room in Chozodia. It appears in Metroid: Zero Mission.
Description[]
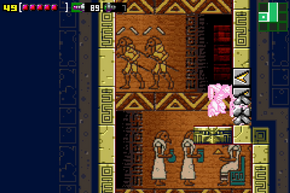
This is a very long vertical shaft on the eastern side of Chozodia's ruins. On the first visit, it appears darkened. On subsequent visits, it will be lit up, with rays of sunshine pouring in from the ceiling. The room's architecture is much like that of the rest of Chozodia, featuring Chozo murals and hieroglyphs in the background depicting clerics bringing offerings to a king, warriors with locked spears and mages. The shaft leads into multiple rooms, some of which have expansions. Near the top of the shaft is a slight slope on a platform in the left wall, and another flat platform a little further down on the right wall. Both are instrumental in a later puzzle.
Samus first enters this room while she is fleeing Zebesians in Chozodia on her way to the top of the ruins. If the Pirate Alarm System is active, a Zebesian will follow her into the room. Initially, much of the shaft is inaccessible to her. While it is possible to visit the upper part of the shaft with carefully timed Wall Jumps, Samus cannot reach any rooms without her Power Suit. She can only jump to a ledge above and crawl into a tunnel that leads to a tightly cramped room.
After returning with the Fully Powered Suit, the room is fully explorable and now patrolled by three Zebesians near the base. Walls guarding the top and bottom left door exits are made of Screw Attack Blocks. If Samus skipped the Screw Attack however, there are hidden tunnels in the wall and floor beside/under each wall that will allow her to circumvent them, marked by Missile Blocks. To obtain an Energy Tank in a corridor within the nearby Space Pirate Mother Ship, Samus must perform a series of complicated Shinesparks through the water in the flooded chamber, and enter this room via the top door (this will require the Screw Attack). She must preserve her Shinespark and drop to the sloped ledge below, then Shinespark into the slope and crouch to continue her speed charge. Next, she must drop to the platform on the right below and Shinespark into the wall, which will take her to the Energy Tank. From that room, she can Shinespark back into this one.
On the slope platform, Samus can shoot a Missile Block in the wall to access a secret tunnel in the flooded chamber containing a Missile Tank.
Connecting rooms[]
- "Patrolled path" (via open door)
- "Crawlspace" (via tunnel)
- Flooded chamber (via open door and tunnel)
- "Exterior" (via Boost Block wall)
- "Chozodia lava pool" (via open door)
Inhabitants[]
- Zebesians (1 pre-Ruins Test if alarm active, 3 post-Ruins Test)
Official data[]

Samus Shinesparking into the wall.
Metroid: Zero Mission: The Official Nintendo Player's Guide[]
- 238 BOOSTER BARRICADE (pg. 83)
- "By detonating bombs on the right ledge in the middle of the shaft, you'll reveal Speed Booster Blocks on the wall. An advanced Speed Booster technique that lets you sustain a charge from your run through the water will allow you to blast through the blocks. Return to the area after you have more Speed Booster experience."
- QUIET THE ALARM (pg. 83)
- "When the alarm is triggered, pirates will continue to attack and some passages will be blocked by metal barriers. By defeating the aliens in your immediate vicinity, you'll avoid detection and you'll cause the alarm to shut off."
- 305 energy tank (pg. 96)
- "a. From the lower-left corner of the large chamber, run rightward as you fire diagonally up and to the right to break through blocks.
- b. Kneel to stop with your booster charged. Jump up to the next level and blast off to the left. After you run up the shallow slope, stop again to sustain your charge.
- c. Space-Jump up to the next ledge on the right, rocket to the right and kneel to stop again as soon as you zoom up the incline.
- d. Still charged, Space-Jump to the next ledge on the left, blast up the slope and kneel to stop again.
- e. Fly to the ledge at the top of the room and take off to the right. You'll run up several small inclines and dash in to the next area.
- f. Stop at the top of the right shaft and Screw Attack through the carved blocks. Drop to the left ledge, dash left and stop before you hit the wall to sustain your charge. Drop again to the small ledge on the right and blast off through a layer of Speed Booster Blocks to a tank."
Gallery[]
")
")