This article's title is conjectural.
Any name given in official media is eligible to become the title of the article.
The current title is not an official name.
The "gambit shaft" is a room in Ridley's Lair/Ridley. It appears, with differences between versions, in Metroid and Metroid: Zero Mission.
Description[]
In both games, this shaft is found in the depths of Ridley's Lair and features a precarious jump.
In Metroid, this shaft links multiple rooms in the lower part of Ridley's Lair. It is constructed from burgundy-colored brick tiles and pipes. At its top is a large blocky overhang on the ceiling and two ledges below a door on either side. The rightmost ledge is also a large block. The two blocks' close proximity makes jumping across the gap from the left side difficult, requiring a well-timed Bomb Jump. This is to obtain a Missile Tank in the middle corridor. If Samus fails the jump, she will fall to the bottom of the shaft and have to backtrack to the top left ledge from the bottom right exit. There is little else in this shaft, aside from a raised block in the floor and an inaccessible pool of lava below. The lower left exit leads towards Ridley's room.
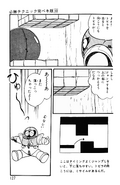
In Victory Techniques for Metroid, there is a short tutorial on jumping across the gap at the top of the room. However, Samus fails the jump and humorously falls down, declaring the move "futile".
In Zero Mission, the shaft is shorter, but slightly easier to navigate. The walls are now of solid construction, made of dark pink and purple walls. At the bottom of the shaft is a small bridge over an empty gap, with the lava no longer present. Hanging from the ceiling are two short pillars, with a midair pedestal in between them, atop which is a Missile Tank. A line of Pit Blocks is below this. To get the tank, Samus can freeze one of two Violas crawling along the midair pedestal and jump off of it onto the tank. If Samus runs in from either room on the bottom left or right until her Speed Booster is activated, she can Shinespark up through the top right ledge to get back to the top of the shaft quickly. With the exception of "Cache Access", every room the shaft connects to is new in Zero Mission.
Connecting rooms[]
Metroid[]
- Middle corridor (via Blue Door)
- "Cache Access" (via Blue Door)
- "Ridley's room access" (via Blue Door)
- Multiviola Nest (via Blue Door)
Zero Mission[]
- "Cache 1" (via Blue Door)
- "Cache Access" (via Blue Door)
- "Save Room 4" (via Blue Door)
- "Sloped passage" (via Blue Door)
Inhabitants[]
- 2 Violas (Zero Mission only)
There are no enemies in this room in Metroid.
Items[]
- Missile Tank (Zero Mission only)
- See above.
Official data[]
Victory Techniques for Metroid[]
This article, section, or file contains text that is unofficially translated by Metroid fans. Some information (such as proper English names of characters or items) may not be accurate. If an official translation becomes available, the fan translation(s) may be replaced.
- Page 127
- "Time your jump well here, as it's easy to fall in. Missiles are in the door ahead."[1]
Metroid Prime: The Official Nintendo Player's Guide[]
- 027 BLAST BALLISTICS (pg. 134)
- "In the middle of the hideout, you'll find yourself on the left side of a gap that has a narrow opening on its right. If you attempt to jump over the gap, you'll miss the ledge. Roll into a ball and plant Bombs that send you into the air. The right combination of Bomb blast and rightward movement will put you onto the ledge."
Metroid: Zero Mission: The Official Nintendo Player's Guide[]
- 168 missile tank (pg. 65)
- "Freeze a creature as it reaches the floating pillar's right side, then use it as a platform to get to the tank. Either jump to the left ledge from the top of the pillar or freeze the other creature and use it as a platform."
- 172 energy tank (pg. 66)
- "Return to the short shaft and fall through a collapsing pipe to solid ground. Starting at the shaft's left side, run to the right through the hatch, build your booster and blast through the blocks on the floor of the corridor."
Gallery[]
References[]


