This article's title is conjectural.
Any name given in official media is eligible to become the title of the article.
The current title is not an official name.
The "hall of pillars" is a room in Ridley's Lair/Ridley. It appears, with some differences, in Metroid and Metroid: Zero Mission.
Description[]
In both games, this green corridor runs through the left side of Ridley's Lair and is infested with enemies. Multiple pillars are spaced across the hall, and a hidden tunnel in the floor allows Samus to negate much of the room.
Metroid[]
In Metroid, the room has a partially metal ceiling with white tiles, but is otherwise constructed out of green bricks and pipes, as well as tiles resembling a chain in the rightmost ceiling. The room is infested with Dessgeegas and Multiviolas. There are seven of the namesake pillars, with two of them found near the front of the room. These are easy to jump over, as are a subsequent group of four pillars made of Fake Blocks.
However, the final pillar stands in front of the exit and is too tall for Samus to scale. She must lay a Bomb in certain parts of the floor and roll through the tunnel underneath. The first entrance to this tunnel is found beside a bridge over a small pool of lava near the front of the room. It is not possible to fall into the lava. The tunnel allows Samus to bypass most of the enemies, as well as the pillar, and reach the exit.
Victory Techniques for Metroid[]
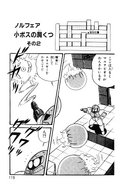
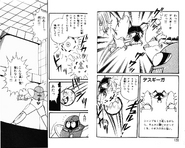
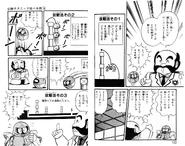
In Victory Techniques for Metroid, Samus enters the room after visiting the corridor above and is surprised by the Multiviolas, which she kills for energy. She then uses her Screw Attack to easily dispatch a Dessgeega, but finds she cannot scale the pillar (depicted here as a wall). Commander Nemo offers three strategies. The first is to freeze a Dessgeega and then use it as a platform to climb over the pillar.
However, Samus does not have the Ice Beam at this point and laments having to backtrack to retrieve it, to which Nemo calls her a "lazy bum". He offers two more strategies: using Bombs to propel herself up and over the pillar, a process which takes her ten minutes, and finally, to use the tunnel under the floor. Samus is frustrated that he did not tell her about the tunnel before, and proceeds into the next room while muttering that he is a "cranky old geezer".
Zero Mission[]
In Zero Mission, the room is roughly the same in length as the original game and the architecture's green color is retained. It is now set in what are likely Chozo ruins, with multiple buttresses and broken columns visible in the background. The lava now engulfs the entire room, but is still at a safe enough level that Samus cannot be engulfed by it. There are fewer pillars, with three of the five in the room being indestructible, and the remaining two made of Fake Blocks. While there is no longer an overly tall pillar blocking the exit anymore, and Samus can jump over all pillars, it can still be preferable to use the tunnel under the floor. The entrance to it is once again found in the floor beside a short bridge over lava. The tunnel has a noticeable grate over it in the foreground.
Connecting rooms[]
- "Cocoon cavern" (via Blue Door in Metroid, Red Hatch in Zero Mission)
- Artificial Passage (via Red Hatch in Metroid, Green Hatch in Zero Mission)
Inhabitants[]
Metroid[]
- 16 Dessgeegas (10 with pink arms, 6 with purple)
- 4 Multiviolas
Zero Mission[]
- 4 Holtz
- 3 Multiviolas
- 4 Dessgeegas
Official data[]
Nintendo Power volume 29[]
- A SECRET PASSAGE (pg. 42)
- "The tall pipe is impossible to jump over. Instead, try going under it. Back toward the entrance you can bomb down into the floor, then roll beneath the obstacle."
Metroid Prime: The Official Nintendo Player's Guide[]
- 026 UNDER, NOT OVER (pg. 134)
- "On your way to the left side of the hideout, you'll find a long hall that ends with a tall pole. Instead of trying to jump over the pole, find a place near the right end of the hall where you can blast your way into a hidden passage that runs parallel to the floor. You'll roll right under the pole and find an Energy Tank in the next room."
Metroid: Zero Mission: The Official Nintendo Player's Guide[]
- 156 ROCK THE GREEN HATCH (pg. 63)
- "The next corridor is packed with enemies. You can avoid them by bombing the floor and rolling through a narrow passage."


