The subject of this article is not named in-game.
The current title is from a guide or other published source.
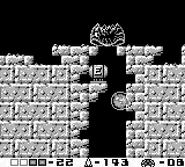
The Grand Cavern[1] is a large room in Metroid II: Return of Samus and Metroid: Samus Returns.
Description[]
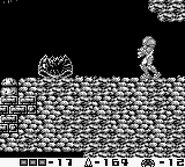
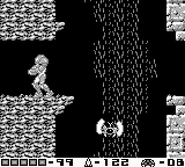
Located in Area 5, the Grand Cavern is the fourth in a series of large dome-like caverns that Samus Aran explores during her mission to exterminate the Metroids. Compared to previous domes such as the Power Up Cavern, the Grand Cavern is notable for being very vertical, with the greatest height of any cavern in SR388.
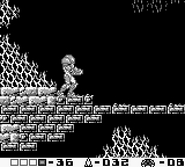
The most significant feature of the Grand Cavern is that it houses the ruins of a large Chozo tower, which Samus can explore to obtain numerous power-ups. There are multiple entrances to the ruins along either side of the tower, and a Dark Chamber can be accessed through the roof.
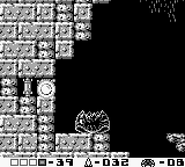
Additionally, the sides of the Grand Cavern branch off into various tunnels, leading to encounters with Metroids. These tunnels are often lined with deadly spikes, requiring careful use of the Space Jump to navigate. Near one of the Gamma Metroid caves on the right side, a Missile Battery (Return of Samus) or Ammo Recharge Station (Samus Returns) is embedded in the side of the tower, providing a much-needed means of replenishing Samus's missiles while fighting Metroids.
The bottom of the Grand Cavern is flooded with water. Vegetation is also present, including the dangerous red plants.
Return of Samus[]
The Grand Cavern is largely populated by Halzyns, flying back and forth between the walls of the Grand Cavern and Chozo tower. This makes ascending the Grand Cavern difficult without the combined use of the Space Jump and Screw Attack. The Grand Cavern is one of only two rooms in Return of Samus inhabited by a Ramulken.
As soon as Samus enters the Grand Cavern for the first time, she will find a bridge over a lake, with bushes growing over the lower right entrance of the Chozo ruins. Due to the large number of Metroids in the branching tunnels, there are a total of six Metroid Husks in the Grand Cavern.
Samus Returns[]
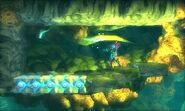
Due to its size, Area 5 is divided into three sections in Samus Returns, with each section connected by elevators. As a result, the entire Grand Cavern is no longer a single room, with the lower half of the cavern split into multiple smaller rooms located on Area 5's lower and middle sections. However, the upper half of the Grand Cavern is left intact as a single room in the top section of Area 5, and remains one of the largest rooms in the entire game. For this reason, this article focuses upon the single Grand Cavern room in the top section, rather than the various rooms comprising the original Grand Cavern's lower half.
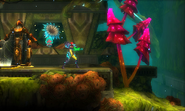
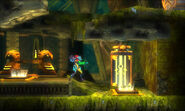
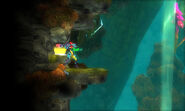
In Samus Returns, the background has been updated with a lot more detail. Building upon the water and bushes originally seen in Phase 7, the Grand Cavern continues Area 5's visual motif of jungles and marshes, with waterfalls and many alien plants populating the scenery. The entire Chozo tower is overgrown with vegetation, and the background shows a large crumbling roof. Met2 Ancient Chozo Ruins plays in this room.
The Stronger Ramulken is now the most common hostile species in the Grand Cavern, with many specimens crawling along the walls of the cavern and tower. Fitting the jungle environment, Blob Throwers also make their home in the Grand Cavern, taking root on the roof of the Chozo ruins much like they originally did in Phase 3.
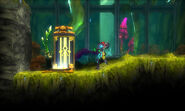
Two Save Stations can be found near opposite ends of the Grand Cavern. An elevator on the lower right side (next to the Save Station) connects to the middle section of Area 5, while a Teleport Station on the left side can be used to quickly teleport to any previously-visited area of SR388.
Connecting rooms[]
- Dark Chamber
- Zeta's chamber (Return of Samus)
In Return of Samus, the Grand Cavern connects to a straight hallway leading to the area's entrance; four spike-lined tunnels leading to Metroids; a cave inhabited by a Gamma Metroid; a vertical shaft in the ruins; a Save Room in the ruins; and two similar rooms on either end of a Gunzoo-patrolled room.
In Samus Returns, the Grand Cavern connects to the Area 5 upper level's left Elevator Room; a superheated room leading to a Gamma Metroid; a tunnel with a large river inhabited by a Gamma Metroid; a tunnel full of red plants and crystals; a room leading to the Zeta's chamber; and (via Elevator) the Area 5 middle level's right Elevator Room.
Inhabitants[]
Return of Samus[]
- 23 Halzyns
- 2 Motos
- 6 Pincher Flies
- 1 Ramulken
Samus Returns[]
- 3 Blob Throwers
- 1 Gryncore
- 1 Meboid swarm
- 1 Paraby swarm
- 6 Stronger Drivels
- 5 Stronger Hornoads
- 13 Stronger Ramulkens
Items[]
Return of Samus[]
- Missile Pod
- Samus can jump through the Metroid Husk on the bridge to land in the water below. Navigating a small tunnel on the left will lead her to a Missile Pod.
- Missile Pod
- Just underneath the second Gamma Metroid cave on the right side of the Grand Cavern, Samus can bomb the wall and reveal a hidden tunnel that will drop her onto a Missile Pod.
- Missile Pod and Energy Tank
- The Grand Cavern's ceiling can be bombed in two places, both of which will reveal a hidden tunnel. This tunnel contains both a Missile Pod and an Energy Tank.
- Energy Tank
- Samus must navigate the Dark Chamber and exit to the Grand Cavern through the opening on the right. An Energy Tank is found underneath the Metroid Husk blocking the entrance.
Samus Returns[]
- Missile Tank
- There is a large greenhouse-like area on the left side of the Grand Cavern populated by red plants. Using the Space Jump and Screw Attack, Samus must break her way through Screw Attack Blocks to reach the top of the area and obtain a Missile Tank.
- Missile Tank
- The upper left corner of the Grand Cavern has a Bomb Block that can be destroyed to reveal a Missile Tank.
- Super Missile Tank
- A small cave is located on the roof of the Grand Cavern, blocked off by Screw Attack Blocks. Using the Space Jump and Screw Attack, Samus must break into the cave, which contains a Super Missile Tank.
- Super Missile Tank
- Samus must use the Beam Burst to kill a Blob Thrower, navigate spikes with the Grapple Beam, and cross over Pit Blocks to reach a Super Missile Tank near the lower left lake of the Grand Cavern. Alternatively, she can return to Area 5 with the baby, who will clear out some crystals and create a shortcut directly to the tank.
Official data[]
Nintendo Power Volume 37[]
- PHASE 7: GRAND CAVERN (pg. 51)
- "Since the huge cavern of Phase 7 has a lot of long drops, it'll pay to perfect the Space Jump technique when you explore this area. The Spider Ball will also help."
Gallery[]
References[]
- ^ Nintendo Power volume 37, pg. 51
| Rooms on SR388 | |
|---|---|
| Surface | "Landing Site" |
| Area 1 | Vertical chamber • Power Up Cavern • Arena area of Chozo base |
| Area 2 | Arachnus' room • Alpha Metroid chamber • Alpha's chamber |
| Area 3 | Three tower corridors |
| Area 4 | "Octroll Lake" |
| Area 5 | Water-filled room (lower/middle) • Grand Cavern • Zeta's chamber • Dark Chamber |
| Area 6 | "Diggernaut arena" |
| Area 7 | Chozo Tower • Final Omega's chamber |
| Area 8 | "Final Purple Liquid Tunnel" • Liquid-filled hall • "Area 8 Ruins" • "Metroid Nest Access" • "First Metroid passage" • "Queen's nest access" • Queen's nest |
| Other Rooms | Return of Samus: Phase 1 • 2 • 3 • 4 • 5 • 6 • 7 • 8 • 9 Samus Returns: Surface • Area 1 • 2 • 3 • 4 • 5 • 6 • 7 • 8 |


