This article's title is conjectural.
Any name given in official media is eligible to become the title of the article.
The current title is not an official name.
The "Hangar Shaft" is a room on the Space Pirate Mother Ship. It appears in Metroid: Zero Mission.
Description[]
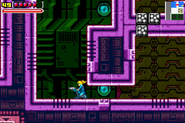
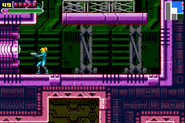
This is one of the longest vertical shafts in the entire Mother Ship, with multiple entrances and divided sections. It has an upper half with six exits into four different rooms, and a lower half connected by ventilation ducts with a single exit. The upper half features a platform taking up the width of the room, with safety rails visible on it in the foreground. Down below (which is what Samus initially enters) is a large chamber with a wall in the middle that is shaped like a T. A thinner walkway is found atop this. In the right wall are two tunnels leading in from the escape-ship bay, the lowest of which is enclosed by Missile Blocks to its left and Pit Blocks underneath. The Pit Blocks drop Samus below to a door, behind which is a Save Room.
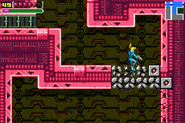
Behind the T-shaped wall are two more platforms. Each platform is supported by girders in the background. The floor underneath the last platform is made of Screw Attack Blocks. An alternate entrance is present in the next shaft, leading into a pink-colored segment of the shaft with three floors consisting partially of Bomb Blocks. These can be destroyed with the Paralyzer. At the base of the shaft is a slightly inclined walkway with another platform below. To avoid alerting two Pirates at the bottom of the shaft, Samus must jump down and Spin Jump to the left to get atop the platform, and crawl underneath a small gap in front of the exit door on the left.
Role[]
Samus arrives in this shaft during her exploration of the Mother Ship, and after escaping the Zebesians in her pursuit. She enters via the enclosed duct, which is the only possible entrance for her at that time as she is suitless. In order to continue into the Mother Ship, she proceeds through this shaft and into the next, alerting a Space Pirate to her presence. It chases her into the lower part of the room, forcing her to quickly flee. At the bottom of the shaft, she can trick one of the two Zebesians into shooting the other by getting between them, triggering one to shoot and jumping away.

Samus drops through the hidden shortcut.
There is a shortcut in this room, which can be used to avoid the Pirate in the following shaft and preserve a Perfect Stealth run. If after dropping through the Pit Blocks and crawling under the wall in front of the entrance, Samus hugs the left wall, she can fire upward to destroy a hidden block in the T-shaped wall. She can then Wall Jump up to where the block was to find a secret tunnel in the wall itself. It will drop her into the pink chamber with the Pit Block floors, where she can continue as normal while avoiding detection by the Pirate in the next room. After falling through the floors, she must be careful to drop to the platform below without alerting the Zebesians at the shaft's base, and quickly exit to the left.
Samus re-enters this room during the escape sequence, as the penultimate room before the escape-ship bay. She passes through the upper walkway, which she is also able to do during her free exploration before the Mecha Ridley battle. If she has activated her Speed Booster two rooms back, she can Ball Spark through the upper walkway of this shaft and into the tunnel that leads to the escape-ship bay.
Connecting rooms[]
- Escape-ship bay (via tunnels and Red Hatch)
- Save Room 2 (via Blue Door, permanently locked on Hard Mode)
- "Cracked surface shaft" (via Blue Door and tunnel)
- "Small compartment" (via Blue Door)
- "Spaceship concourse" (via Blue Door)
Inhabitants[]
- Red Zebesians
- 2 Atomics (escape sequence, not on Easy Mode)
There are two Zebesians at the base of the shaft. If Samus is detected in the "cracked surface shaft", the Zebesian there will follow her in. Upon return with the Fully Powered Suit, the middle part of the room has one red and one black Zebesian, and another black Zebesian atop the highest walkway. There is one red Zebesian here during the escape sequence.
Official data[]
Metroid: Zero Mission: The Official Nintendo Player's Guide[]
- 219 ON THE RUN AGAIN (pg. 79)
- "As you advance, you'll set off the alarm again. Look for cracks in the floor and fire through them to create a passage that weaves down toward the bottom of the ship. Eventually you'll drop into a small compartment where you'll be able to wait out the alarm."
- 249 MAKE YOUR WAY THROUGH THE BAY (pg. 84)
- "Open the red hatch above the save room and climb to the top of the spaceship bay. Hop up to a narrow tunnel and roll left into the left side of the bay."


