| Line 59: | Line 59: | ||
==Heated shafts== |
==Heated shafts== |
||
{{Main|Heated shafts}} |
{{Main|Heated shafts}} |
||
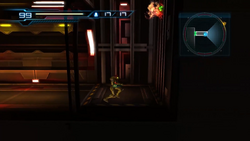
| + | [[File:Heated shafts - first shaft.png|right|thumb|250px|link=Heated shafts]] |
||
| + | {{:Heated shafts}} |
||
| + | {{Col-begin}} |
||
| + | {{col-2}} |
||
| + | '''Items and logbook entries''' |
||
| + | :• [[Missile Tank]] x2 |
||
| + | {{col-2}} |
||
| + | '''Connecting rooms''' |
||
| + | :• [[#Flame hallway|Flame hallway]] (automatic door) |
||
| + | :• [[#Navigation Booth B|Navigation Booth B]] (automatic door) |
||
| + | {{col-end}} |
||
==Navigation Booth B== |
==Navigation Booth B== |
||
Revision as of 04:56, 5 July 2020
List of rooms in Metroid: Other M
|
|---|
Main Sector • Sector 1 / Biosphere • Sector 2 / Cryosphere • Sector 3 / Pyrosphere • Bioweapon Research Center
|
This is a list of minor rooms in Sector 3 / Pyrosphere in Metroid: Other M. Larger rooms have their own pages and are linked here. Many of these names are unofficial; such names will be highlighted in quotation marks.
Long elevator shaft
Red-lit corridor
Lava cavern
Inclined corridor
The "inclined corridor" connects to the lava cavern from two exits, and into a Navigation Booth to the right. It is a two-level stairwell connecting from the upper area with the broken glass tube, to the lower area that is exposed to hot air. Both sets of stairs have a noticeably red railing. The Navigation Booth benefits Samus, as she will have a checkpoint if she dies during the Vorash chase sequence that will occur when she enters the outdoor lava cavern.
On the floor in between the sets of stairs is a small alcove in the wall with three Pow. They serve as a hint that there is an item in the wall; in this case an Energy Part through a tunnel. The lower staircase has a blast shield on it that can be removed with a Super Missile; doing so allows Samus to go under the stairs and obtain a Missile Tank.
Navigation Booth A is the first Navigation Booth in the Pyrosphere. When Samus uses the booth for the first time, the Map populates and creates a waypoint to the next Navigation Booth outside the heated shafts. Unlike most Navigation Booths, this one only has a single exit.
Pyrosphere combat arena
Ventilated corridor
The ventilated corridor is a horizontal hallway with a sand floor and eight wall vents (in pairs) that release steam and fire at regular intervals. There are several rectangular lights on the ceiling and wall as well. The floor is uneven and there are several raised sections of rock protruding from under the sand, and what appear to be two electricity panels on either end of the hallway.
Flame hallway
Heated shafts
The room consists of a pair of tall shafts that can be traversed with the Kick Climb, and an L-shaped corridor in between them. The first shaft is ascended, while the second is descended.
|
Items and logbook entries
|
Connecting rooms
|
Navigation Booth B is the second Navigation Booth in the Pyrosphere, found outside the heated shafts. When Samus uses the booth for the first time, the map populates with the locations of two other Navigation Booths, but points Samus to only one due south of her position.
Infested L-shaped corridor
The "infested L-shaped corridor" is accessed from the northern side of the lava cavern. It is inhabited by about four Sovas, and there is a Fly Pod around the corner that spawns Mellas until destroyed. It leads into the Floor Observation Room.
Floor Observation Room
Inside corridor
The "inside corridor" leads from the Floor Observation Room back out into the superheated environment of the Pyrosphere. There is little to it feature-wise; its notable features are tubular lights mounted on the walls and floors, with the wall lights standing behind gates. Halfway through the corridor on the right side is a tunnel on the wall, which leads to a Missile Tank back in the wall within the Floor Observation Room. On the initial visit the room is empty, but after Samus's return to the Pyrosphere it is inhabited by Sovas and Cyborg Zebesians.
Volcano corridor
Navigation Booth C is the third Navigation Booth in the Pyrosphere. It immediately follows the volcano corridor, in which Samus would have lost a lot of energy from exposure to extreme heat. When Samus uses the booth for the first time, the map populates with the location of the next Navigation Booth, as well as the Main Sector elevator. On her first visit, the room may rock a little from the volcanic meteors impacting the floor outside.
Interior entrance
Crater Interior
Launcher hallway
The "launcher hallway" is a straightforward corridor connecting the lower Crater Interior to the Main Sector elevator. The room contains five Sovas and a one-way Morph Ball launcher in an alcove, which Samus comes through using a shortcut after the Geothermal Power Plant.
Transport to Main Sector
Sova hallway
The "Sova hallway" is a straightforward hallway inhabited by two Heat Bulls and three Sovas. It has nothing of importance.
Rhedogian room
Dessgeega-infested hall
The Dessgeega-infested hall[1] is a simple, L-shaped corridor. Near both of the doors are two dividers on the floor that Samus will automatically vault over when she approaches. As its name implies, the most notable feature of the room are the two Dessgeegas, which stomp around aimlessly. Samus can choose whether to kill them or not. Upon entering the room initially, she is greeted by five Mellas. Aesthetically, the room has little in the form of unique features, apart from a series of curved orange lights on the walls. This room leads into a Navigation Booth connected to the "lava crossing" (see below).
Navigation Booth D is the fourth Navigation Booth in the Pyrosphere. It follows the Dessgeega-infested hall and leads into the lava crossing. After Samus is unable to cross, she returns here and receives a transmission from Adam. The map directs her to the Main Sector elevator.
| “ | OK, Samus. Head to Sector 2. There's a high probability of survivors hiding there. We'll have to take care of that freak of nature later. | „ |
—Adam | ||
Lava crossing
The "lava crossing" is a room preceding the mentioned Navigation Booth. As the name implies, it is filled with lava and cannot be crossed without using Grapple Points. Aside from the ledge Samus enters the room on, there is one platform in the middle and then the one at the other end, each higher than the one before. When Samus enters it for the first time, she will find herself unable to cross it because the Grapple Beam has not been authorized. Upon going back into the Booth, she is directed to look for survivors in the Cryosphere. After returning - shortly before which the Grapple Beam was authorized - Samus is able to cross the room, into Blast Furnace Observation. In an alcove under the floor on the other side is an Energy Part. The room is inhabited by a Magdollite on further visits.
Blast Furnace Observation
Navigation Booth E is the fifth Navigation Booth in the Pyrosphere. It immediately follows the Blast Furnace Observation room. When Samus enters for the first time, Adam contacts her again before she can use the booth. Once he is done speaking to her, the map populates with the Geothermal Power Plant's location, and the door locks until Samus uses the booth.
| “ | Samus, it looks like that monster is headed to the geothermal electric-power generator. [Samus gasps]
Track it and put an end to it. |
„ |
—Adam | ||
Using the booth populates the map with the next set of rooms in the experimental simulated desert area.
Sandfang hall
The "Sandfang hall" follows immediately from a Navigation Booth after the Blast Furnace. It is the first room of the Pyrosphere's experimental simulated desert area. The uneven floor is covered in sand and if walked over, a Sandfang will spawn. It is possible to avoid drawing out the creature by grappling over it using a Grapple Point.
Environmental Test Floor
Mella stairwell
The "Mella stairwell" is a confined, black staircase with yellow lights. There are four Mellas in the room, hence the name. It leads directly into the next named room, the Desert Refinery.
Desert Refinery
Curving catwalk
The "curving catwalk" is a midair catwalk suspended over an indoor facility. Samus is attacked by multiple FG-1000 and FG II-Graham units here. Once she has cleared them out, she must Speed Boost along the catwalk and Shinespark up at the end to reach a higher ledge with a wall hole leading into a midair tunnel in the Desert Refinery, which then leads into another Navigation Booth.
Navigation Booth F is the sixth Navigation Booth in the Pyrosphere. It follows the Desert Refinery from the highest floor. There is no update to the map after using this booth.
Multi-step catwalk
The "multi-step catwalk" is entered from the above-mentioned Navigation Booth. It is similar to the curving catwalk; however, there are many more robotic units and the pathway is not free of obstructions. Along the way are several raised steps that must be jumped over, and floor barricades that Samus can vault over. The raised sections have ladders on them, which are unusable by Samus. These were likely used by the ringleaders and/or other BOTTLE SHIP staff, who did not have the agility and movement that Samus does.
Sand Tower summit
Desert cave
Lava ponds
The "lava ponds" are accessed from a high ledge in the lava cavern, which is reached by ascending three platforms near the door to the infested L-shaped corridor and using a series of Grapple Points. The room is a short hallway inside a cave with several fissures of exposed lava. It is not difficult for Samus to navigate around the pools, although there are several Magdollites which can make movement difficult unless they are destroyed. It leads into a Navigation Booth.
Navigation Booth G is the seventh and final Navigation Booth in the Pyrosphere. It follows the lava ponds and leads into the carcass room. Using the booth populates the map with the rooms leading up to and including the Geothermal Power Plant.
Carcass room
The "carcass room" is entered right after the Navigation Booth. Samus automatically enters Search View upon stepping into here, noticing a molted husk on the wall - that of the Mystery Creature she had been tracking. The husk was not removed by the Galactic Federation upon their seizure of the BOTTLE SHIP and remains there after the credits. The room is illuminated through the presence of lava underneath the floor, seen through impenetrable glass. A Missile Tank can be found in this room. If the next corridor is cleared of enemies, and Samus Speed Boosts back into this room, she can Shinespark to the ceiling and Space Jump to a ledge on the right with this tank.
Glass tube
The "glass tube" is, as the name would suggest, a long glass tube situated above lava. The tube itself is similar to that found in the lava cavern, but remains intact for the duration of the game. When Samus enters the room for the first time, more unsettling music begins to play. Along the path are three pairs of two FG-1000 units, extending an electrical field in Samus's path. Contact with the path deals 35 units of damage to Samus. She can either jump over the fields or shoot the drones to remove them. Either way, she can then proceed into the Geothermal Power Plant.
Geothermal Power Plant
Undershaft
The "undershaft" is the final room of the Pyrosphere and is reached through a Super Missile blast shield in the outer Geothermal Power Plant. It begins as a hallway that turns into a drop shaft with Grab Ledges on either wall. The bottom of the first shaft contains lava. A hole in the left wall further down leads into a tunnel with a Missile Tank. Similar to the earlier heated shafts, a sensor (this time farther down) must be shot to open a blast door that leads to a Morph Ball launcher, which takes Samus back to the launcher hallway.
References
- ^ Metroid: Other M Premiere Edition, page 84: "Sprint down the Dessgeega-infested hall and make a right at the far corner. Stop in the Navigation Booth to save your progress and unlock the next hatch."