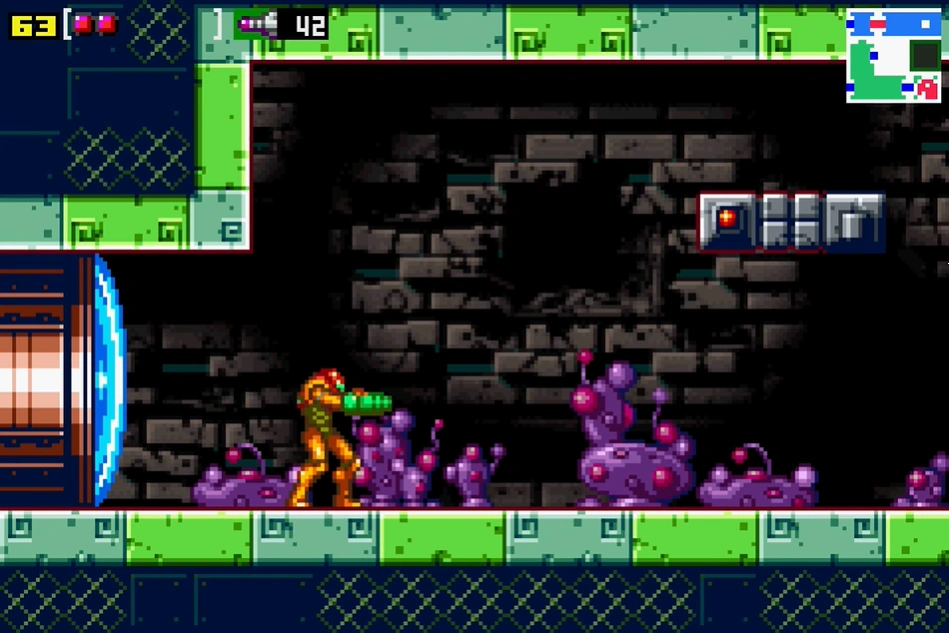
List of rooms in Metroid: Zero Mission
|
|---|
This is a list of rooms in Kraid in Metroid: Zero Mission. Larger rooms have their own pages and are linked here. Many of these names are unofficial; such names will be highlighted in quotation marks.
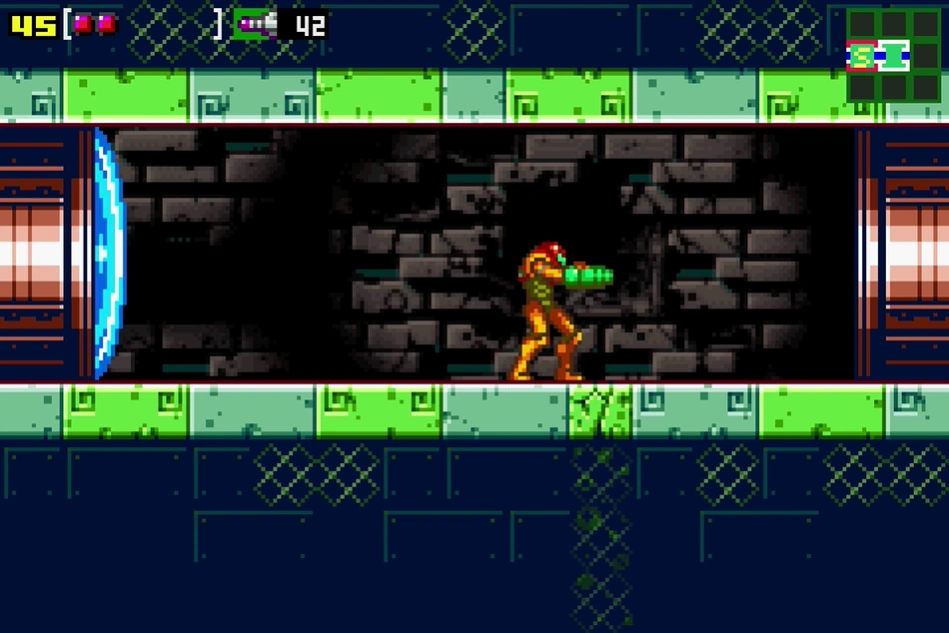
Kraid entrance shaft[]
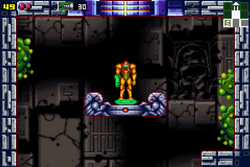
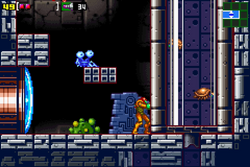
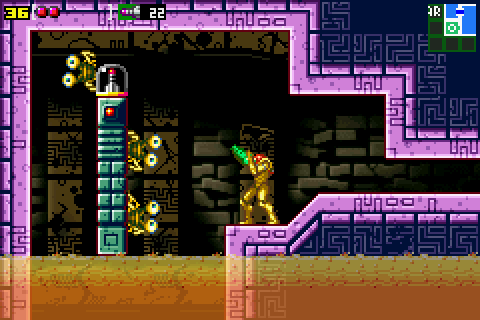
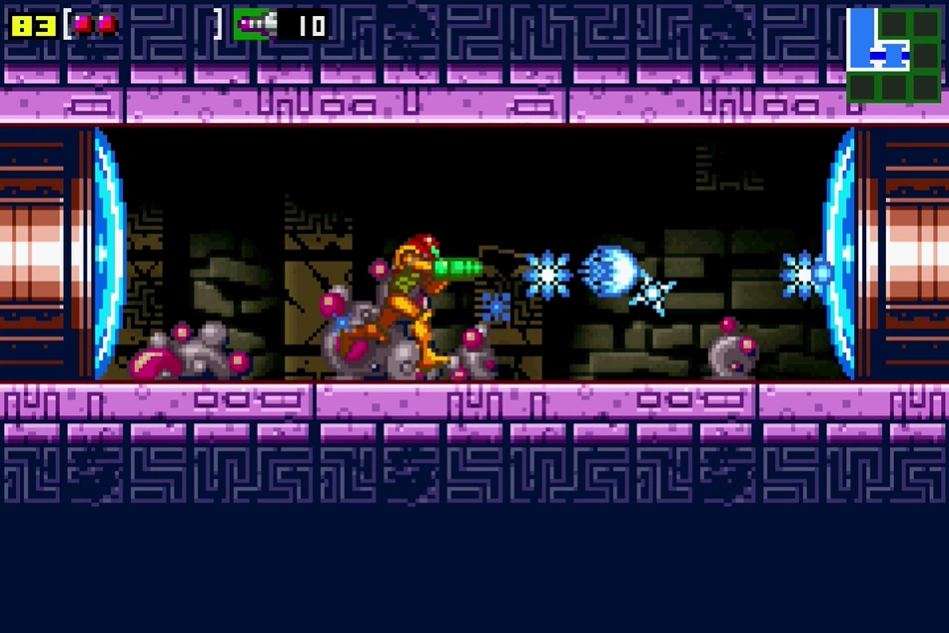
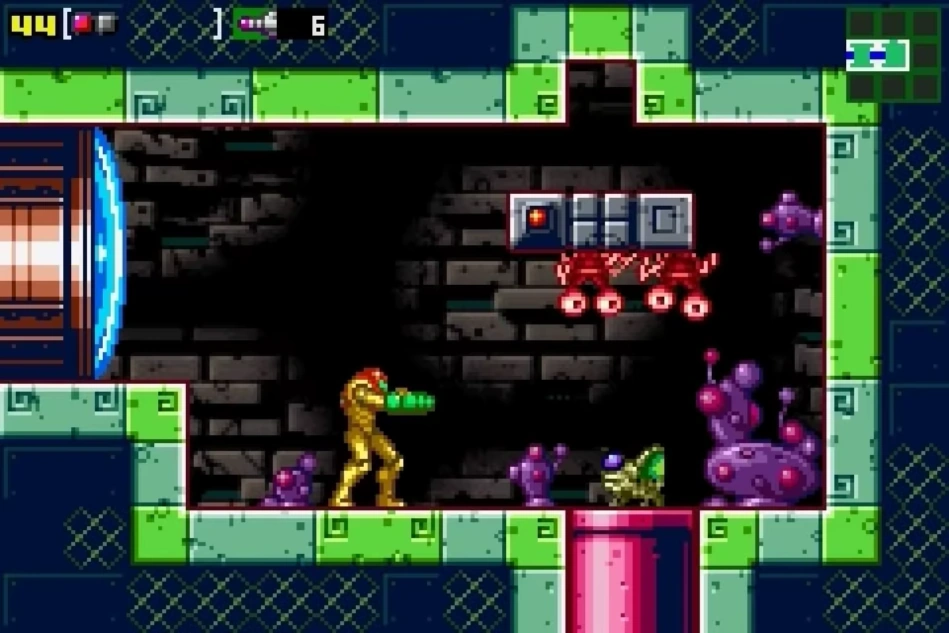
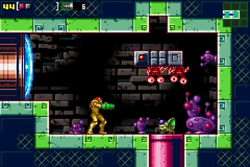
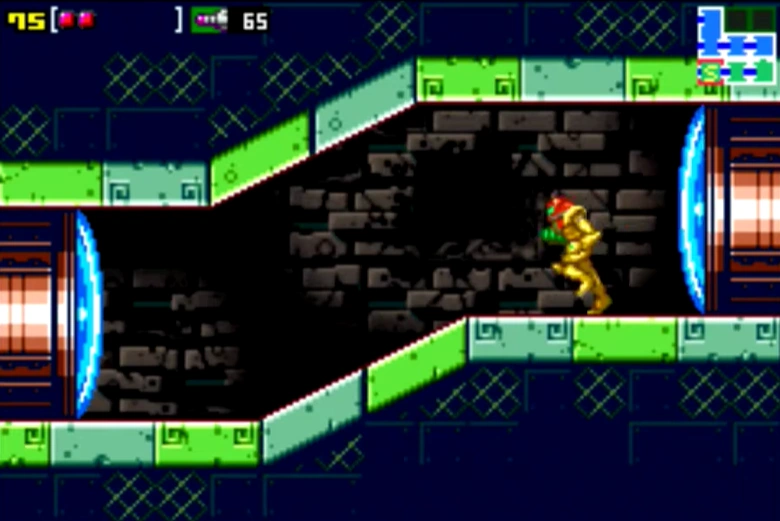
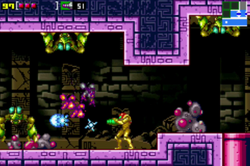
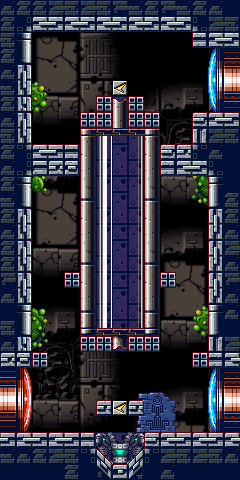
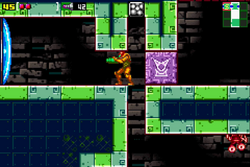
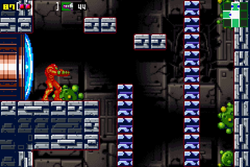
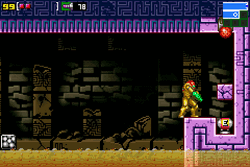
"Kraid entrance shaft" is the first room in Kraid's Lair. It appears in Metroid and Metroid: Zero Mission. In Zero Mission, the room is somewhat shorter owing to the Game Boy Advance's smaller screen, but has not been changed much. Its walls are now a dull blue-gray and silver, with each block still comprised of multiple bricks. The background depicts ancient ruins, presumably Chozo. The bushes lining the walls are thicker and appear to have pustules. There are now more midair platforms, and a fake floor of blocks (colored blue) exist under the midair rectangular block; the floor can be destroyed.
Additionally, the wall at the bottom of the room is much taller and has steps on its right side. Given the game's addition of the Turbo Bomb and Power Grip techniques, it is now easier to climb over the wall. When Samus leaves Kraid's Lair after defeating its namesake, a cutscene plays showing Ridley aboard the Space Pirate Mother Ship glaring as the ship lands on Zebes. This room contains 3 Zeelas and 3 Rippers.
|
Items
|
Connecting rooms
|
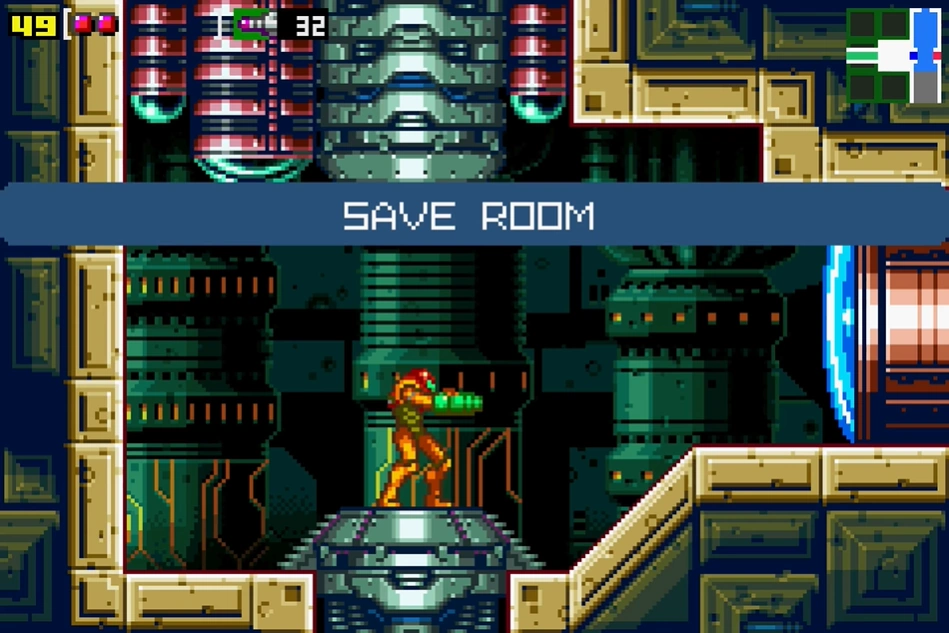
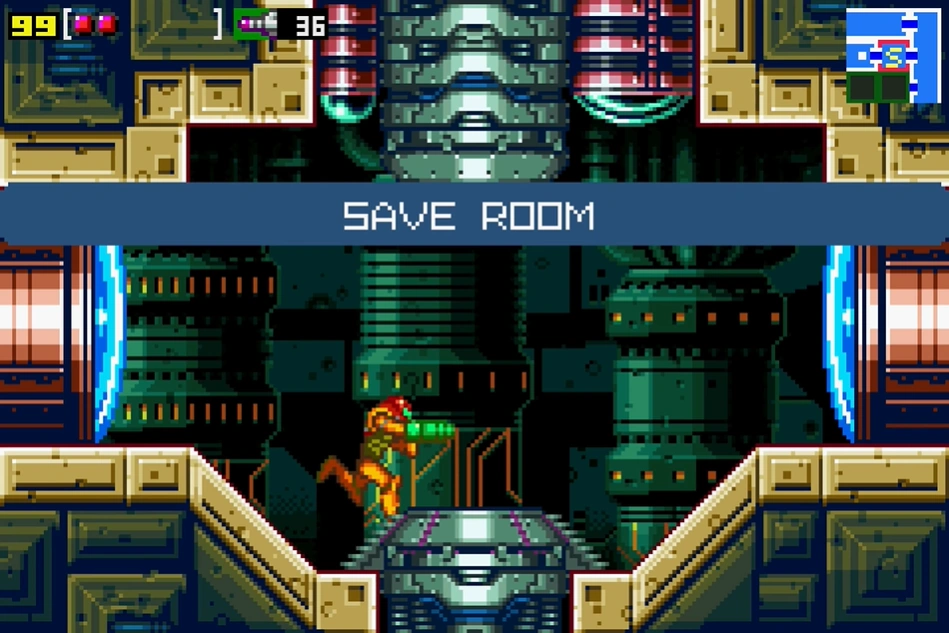
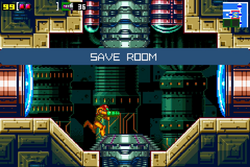
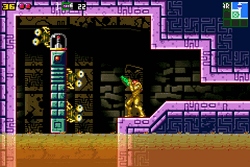
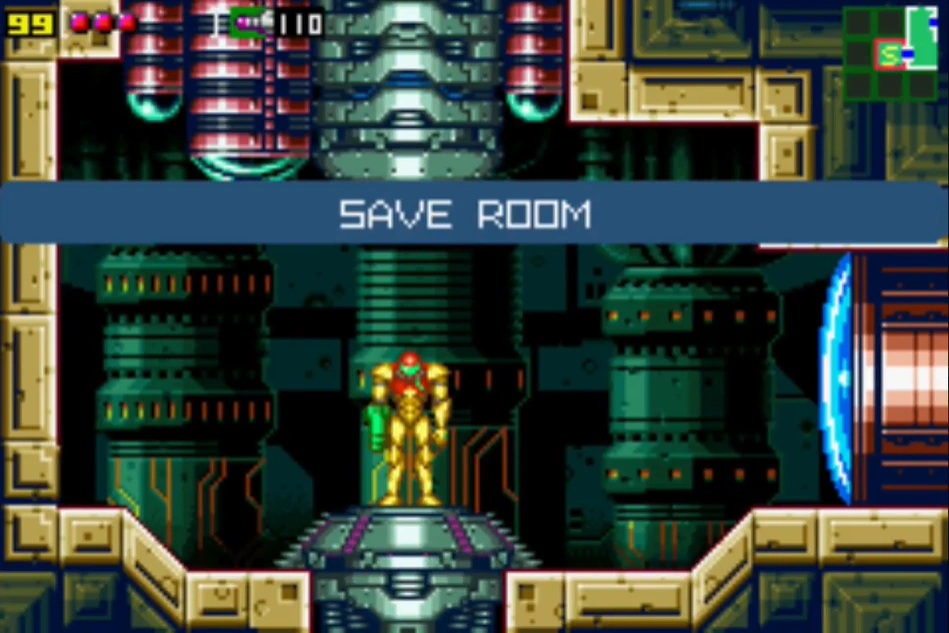
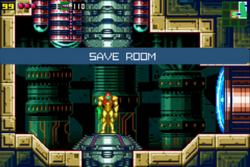
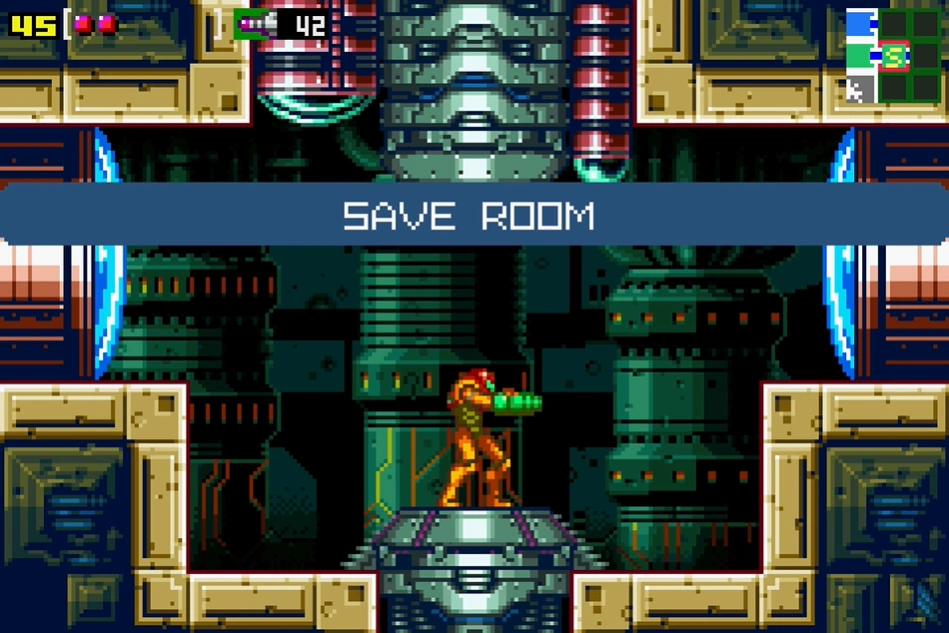
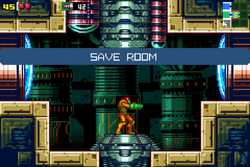
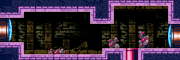
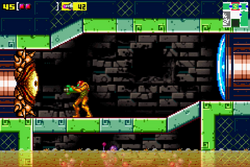
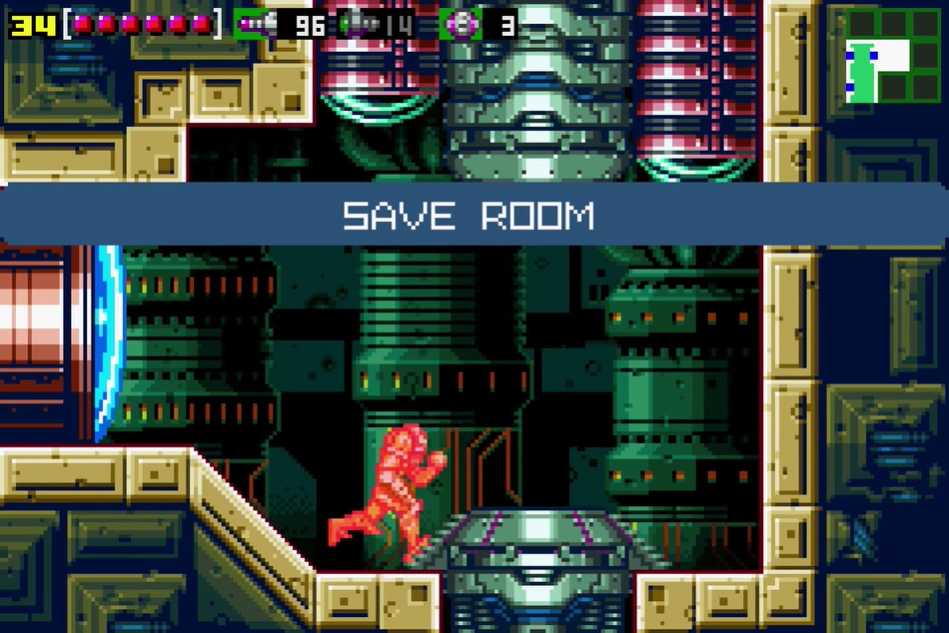
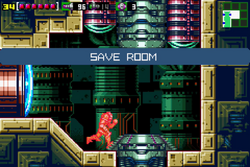
Save Room 1[]
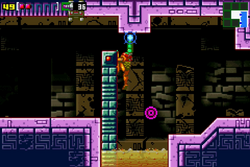
"Save Room 1" is the first Save Room in Kraid. It is accessible from the left side of the Kraid entrance shaft. A hidden tunnel in the wall (seen in the image to the right, noted by the gap in the wall's dark green tiles) leads into an otherwise inaccessible alcove in the Barisute pit, which contains a Missile Tank.
|
Items
|
Connecting rooms
|
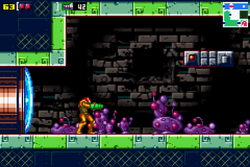
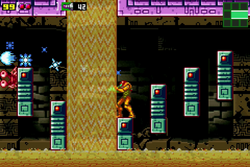
Barisute pit[]
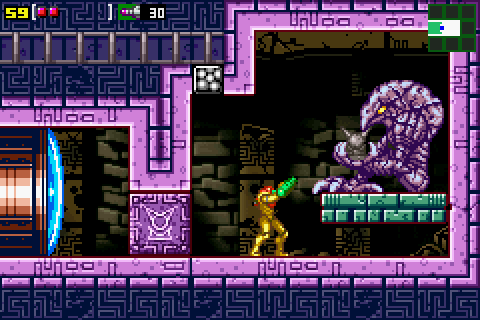
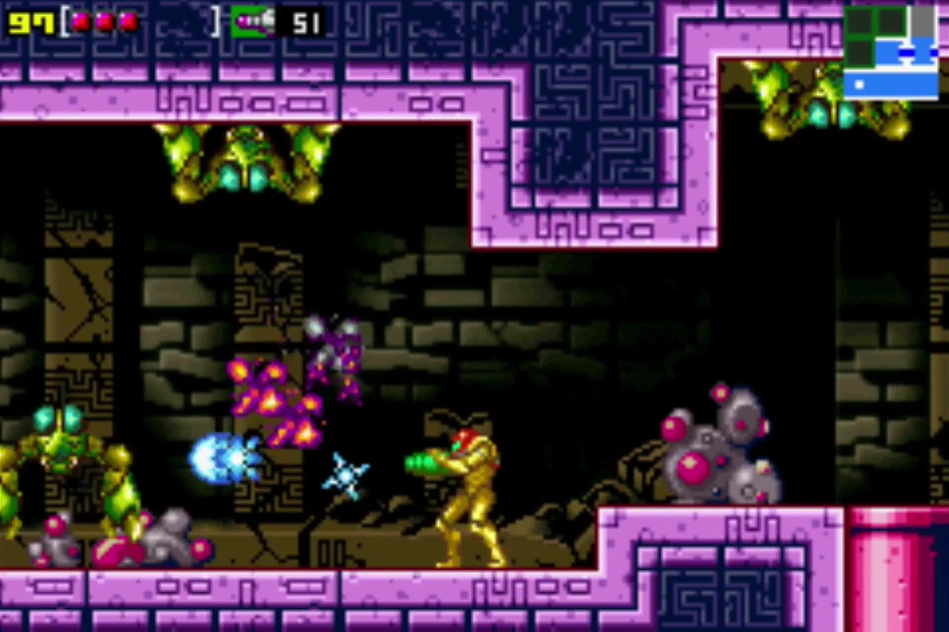
The "Barisute pit" is a room in Kraid's Lair. It appears, with significant differences between versions, in Metroid and Metroid: Zero Mission. In Zero Mission, the room's appearance has significantly changed, and it is most likely not visited immediately. The secret alcove with the acid pool, five pedestals and the Missile Tank has been moved to the lower right, and can only be accessed from a small tunnel in the Save Room to the left of the central shaft. The left part of the room is much larger and has two levels with one door each, both leading into Kraid's leftmost shaft. The architecture is now a combination of a light and dark purple, whereas in Metroid it was blue. Ruined walls can be seen extending into the background, along with curious fungi or cacti-like plants with red pustules.
Samus can only enter the pit through the lower door, where she is greeted by a Barisute. After defeating it, she can scale a wall and climb up to the top level using ledges. On the top level is a tight tunnel the Morph Ball can fit through, with the bottom made of Fake Blocks. The upper door remains locked until Samus defeats a second Barisute directly under this tunnel, which she can do easily using the Wave Beam (if obtained early) or by dropping below using a Bomb and killing it with her weapons. If Samus angles closely on the edge before the first breakable block, she may also be able to simply camp at the edge and fire diagonal shots at the large creature, who is unable to reach her from the small area she is aiming from. Once the beast is felled, Samus can leave and access a Missile Tank in the previous shaft.
|
Items |
Connecting rooms
|
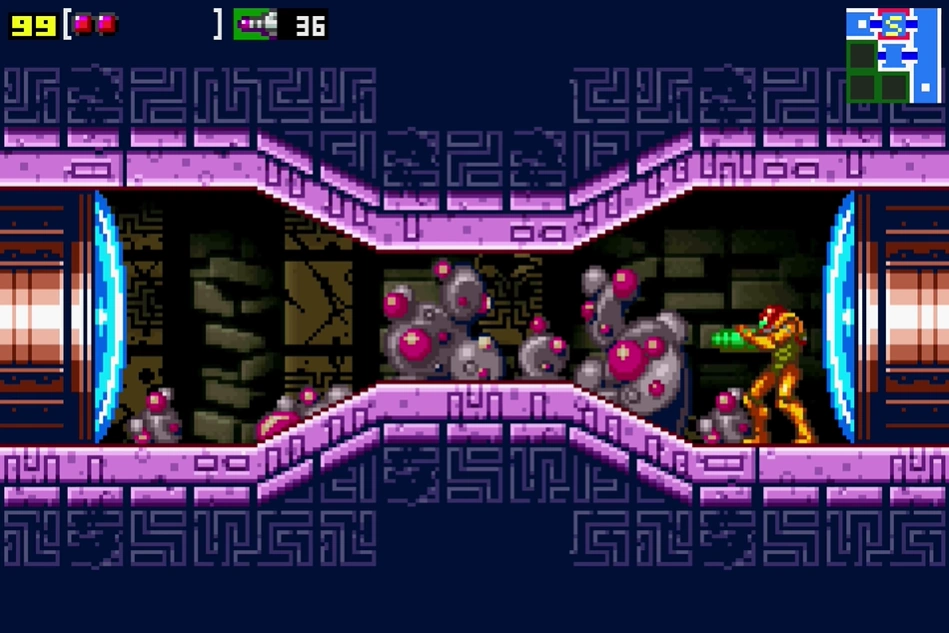
Caged Sidehopper hall[]
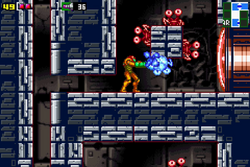
The "caged Sidehopper hall" is a room in Kraid's Lair. It appears, with differences between versions, in Metroid and Metroid: Zero Mission. In Zero Mission, the room's general appearance has been altered, but it still features the acid, midair platforms and pedestals, and Missile Tank exactly where it was in the original game. The walls, ceiling and floor are now a solid combination of light and dark purple with etchings spread throughout. Ruins and cacti-like plants can be seen in the background. It is longer than the original game as the portion after the acid has been lengthened. The ceiling and floor narrows in two parts of this path, and are blocked by walls of Fake Blocks, in between which are two Sidehoppers each. In between these narrowed "cages" is a larger alcove with an Air Hole in the center of the floor. This spawns Geegas two at a time. To proceed, Samus must kill the Sidehoppers. On return visits, only two Sidehoppers are present.
|
Items |
Connecting rooms
|
Apex launcher shaft[]
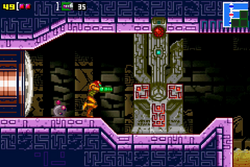
The "apex launcher shaft" is a room in Kraid's Lair. It appears, with significant differences between versions, in Metroid and Metroid: Zero Mission. In Zero Mission, the room serves a greater purpose and under the normal sequence of events is one of the first rooms visited in Kraid. Parts of it are now sealed off. It is shorter in length, but still connects to the same four (changed) rooms as the original game. The tiles are still mostly grey, but more rectangular in shape, and much of the walls are now a dark blue. There are fewer bushes growing from the walls, and they now have pustules. The initial room is a short shaft with four platforms leading up to the ceiling, and a glass tube to the right. Beside this tube is a headstone with an etching depicting a ball being propelled upward. This is a hint to a Morph Ball launcher in the ground, accessible by laying a Bomb directly underneath the stone.
Using the launcher in Morph Ball form propels Samus up through the glass tube to the top. The tube is filled with six Rippers, all of which are killed when Samus collides with them. The force of her hitting the underside of a midair wall is enough to knock two Zeelas off their perches above. Samus will then land in a short tunnel. After climbing out, she finds a wall on the left and the midair wall she collided with on the right, each with two alcoves for her to jump to using her Power Grip. The last alcove has a Fake Block in it, which can be removed with a beam shot. Samus can then climb to the top of the shaft, to be able to access the room with the ancient Chozo machine. The second and third doors are found below the uppermost door, but the second highest can only be entered from the machine's room. A Pit Block underneath the door to that room drops Samus to the third door, which leads toward the Acid Worm's room. This room has 7 Zeelas and 6 Rippers.
|
Items |
Connecting rooms
|
Kraid's highest corridor[]
"Kraid's highest corridor" is a room in Kraid's Lair. It appears, with significant differences between versions, in Metroid and Metroid: Zero Mission. In Zero Mission, the room's appearance has been significantly overhauled and differentiated from the other three identical rooms. It now has a purple aesthetic, wider acid pools (of which there are now only two) and a single Air Hole (although Geegas spawn from one of the acid pools in addition to the hole). In the background ruins can be seen, as well as two large grey cacti-like plants. An inactive zip line is present on the ceiling; this is activated in a corridor two rooms away. To cross the room, Samus must shoot at two Fake Blocks beside a pillar standing in the first acid pool, which is in front of the entrance, and use her Power Grip to climb over the pillar. She can jump from a raised step on the middle platform to dry land on the left. To cross back, Samus will have to reactivate the zip lines, or alternatively attempt a Diagonal Bomb Jump. Once the zip line is activated Samus can call it to her side by shooting a red switch on the ceiling.
|
Items
|
Connecting rooms
|
Zeela-infested shaft[]
The "Zeela-infested shaft" is a room in Kraid's Lair. It appears, with differences between versions, in Metroid and Metroid: Zero Mission. In Zero Mission, the room's appearance is somewhat changed and its role is increased. This is because the normal course of events (without Sequence Breaking) now require Samus to come to this region of Kraid to reactivate the zip lines. The shaft has decreased in height, and each door is now found on ledges protruding from the right wall, leaving a narrow gap next to the right wall for Samus to drop down. Samus enters the room via the uppermost door (from the highest corridor). The right wall initially appears to be solid, with a single blue block in the wall being the only hint that something is hidden.
At the very bottom left of the room is a Morph Ball launcher, which Samus can use to launch herself back to the top of the shaft. Doing so, she can drop down again and lay a Bomb near the block in the wall to expose a hidden tunnel. This leads into a small alcove with a midair block, which four Zeelas are found crawling around. A Red Hatch here leads into the hallway with the machine that reactivates the zip lines in Kraid, allowing Samus to access more of the lair. Another block with the same amount of Zeelas is found directly below the second level of the shaft, to the right of the launcher.
When Samus has defeated the Acid Worm in its room (through the bottom right door of this shaft), she must return to this shaft and launch herself to the top in order to leave the upper-right part of Kraid.
|
Items
|
Connecting rooms
|
Chozo machine hall[]
The "Chozo machine hall" is a room in Kraid. It appears, with significant differences between versions, in Metroid and Metroid: Zero Mission. In Zero Mission, the room's appearance has been changed and it is now different from the other two corridors above and below it. Its ceiling and floor are now made of solid material with various Chozo symbols etched into them. Ruined walls with cracks can be seen in the background. It is about the same length as it was in the original Metroid. The acid pits have been consolidated into one large pit near the right side, with the ground on the left having a slight divot in the center.
An ancient Chozo machine is found here. Once Samus enters the room, the door locks behind her. She can morph into a slot within the machine, and the resulting surge of electricity reactivates all zip lines in Kraid, including one in this room. The switch to bring the zip line over to the left is found directly above the machine's slot for the Morph Ball. As Samus rides the zip line, she will come in contact with an Energy Tank atop a pedestal that is suspended in the acid, and automatically collect it. Directly to the left of the pedestal, Geegas can be found spawning two at a time from the acid. The Energy Tank offers Samus a last minute energy boost ahead of her battle with the Acid Worm.
|
Items |
Connecting rooms
|
Save Room 2[]
"Save Room 2" is the second Save Room in Kraid. It can only be accessed from the Chozo machine hall. It leads back into the apex launcher shaft, in an enclosed space. This is the only Save Room before the Acid Worm battle.
|
Items
|
Connecting rooms
|
Worm access[]

"Worm access" is a new room that did not exist in Metroid. It connects between the apex launcher shaft (in the enclosed part only accessible through the Chozo machine hall) and the Acid Worm's room. It is a short passage with a narrow center; the ceiling and floor being raised/lowered into the shapes of trapezoids. Beyond this, the room's features include hieroglyph-like symbols etched into the ceiling and floor, a strange cacti and ruined walls in the background.
|
Items
|
Connecting rooms
|
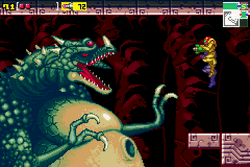
Acid Worm's room[]
The "Acid Worm's room" is a room in Kraid. It appears in Metroid and Metroid: Zero Mission, with significant differences between versions. The room underwent a significant change in Zero Mission, as did the two corridors above it that were once identical. It is now flooded with acid, save for a pair of cube-shaped platforms suspended in midair. The room's architecture is now a mixture of light and dark purple and appears to be of Chozo origin, as there are several hieroglyphs resembling that of their written language within the walls. Additional ruins can be seen in the background. A zip line is integrated into the ceiling, with a switch for it above each midair platform on either side.
When Samus rides along it, the Acid Worm suddenly appears from the acid and begins a boss battle. Periodically, it causes the acid to rise above the level of the lowest platforms, forcing Samus to jump to the higher one. She must also use the zip line to avoid the worm's ramming attack. Once the monster has been defeated, it sinks into the acid, which drains. This reveals a lower floor with a visible gap, which can be opened by using Bombs. This leads to a platform in a lower chamber suspended above acid, with three pedestals on either side. An opening in the left wall leads into a chamber with a Missile Tank.
|
Items
|
Connecting rooms
|
Cache[]
The "cache" is a new room that did not exist in Metroid. It is accessible from a small tunnel in the bottom left corner of the Acid Worm's room. It cannot be accessed until the worm is defeated and the acid in the room drained. This is a small chamber with a pedestal directly above a pool of acid, along which three Zeelas crawl. Atop the pedestal is a single Missile Tank for Samus to collect.
|
Items |
Connecting rooms
|
Acidic concourse[]
The "acidic concourse" is a room in Kraid. It appears, with significant differences between versions, in Metroid and Metroid: Zero Mission. In Zero Mission, this room's appearance has been significantly changed. It is now constructed from solid purple material and partially submerged in acid. As with other rooms in Kraid, cacti and ruins can be seen in the background. Under normal circumstances, Samus cannot get through this room without first activating the ancient Chozo machine to energize the zip lines in the lair. Upon entry, she is greeted by a short wall in front of her with a tunnel above it blocked by two Fake Blocks. Destroying these, and a subsequent block after allows her into a short, zizagging tunnel leading to the rest of the room. Here, only four parts of the walkway are above acid level, and the fourth cannot be reached without the zip line above. As Samus is using it, she must shoot five Fake Blocks in her way to avoid being knocked down. Alternatively, she can Bomb Jump up to the zip line and attach her Morph Ball to it. It will then take her over the blocks entirely and drop her off on the other side.
It is possible to get through this room without using the zip line, but it is much more difficult. Samus must carefully jump to the first midair block with her Power Grip, roll atop it, then quickly roll off, unmorph and grab onto the next one. On the last block, she must propel herself off using a Bomb to get over the ledge before the exit. A demonstration can be viewed here.
|
Items |
Connecting rooms
|
Bottomless Pond[]
The Bottomless Pond is a room in Kraid. It appears, with significant differences between versions, in Metroid and Metroid: Zero Mission. In Zero Mission, the shaft is slightly shorter and now has four doors, two of which connect to the same room. A large wall with a glass tube inside of it separates the first two doors; a Missile Tank can be found on the tube. Three midair platforms are present between the second and third doors. The bushes are now larger and have green pustules growing from them. The fake acid is now present under a bridge made of Bomb Blocks, which stretches into an alcove in the left wall. When the blocks are detonated with a Bomb, Samus will drop through the illusionary substance to a much lower shaft. While there are much fewer Rippers in the shaft in the remake, Samus's Wall Jump will allow her to re-ascend the shaft if she wishes. At the bottom of the shaft are two more midair platforms inhabited by Zeelas, and a door leading to Kraid's room. The room contains 3 Rippers and 4 Zeelas.
|
Items |
Connecting rooms
|
Antechamber[]
- For the room in Metroid Prime, see Antechamber.
The "antechamber" is a small room accessible from the base of the Bottomless Pond shaft. The room has no unique features, containing the same Chozo-like hieroglyphics, cactus and crumbling walls and pillars in the background as other rooms. It leads into the Drain.
See here for the room's equivalent in Metroid.
|
Items
|
Connecting rooms
|
Drain[]

The drain is a small room nearly identical to the previous antechamber, and connects from that antechamber to the "ball launcher speedway". The difference between this room and the antechamber is the presence of a secret tunnel (referred to as a drain in the strategy guide[1]) in the floor directly underneath the door to the antechamber. This leads to a hallway connected to the second Unknown Item.
See here for the room's equivalent in Metroid.
|
Items
|
Connecting rooms
|
Mini-Kraid's room[]
"Mini-Kraid's room" is a room in Kraid. It appears in Metroid and Metroid: Zero Mission. In the former game, it is the location of Mini-Kraid, who is absent from Zero Mission. Another version of this room appears in Super Metroid, where it is part of Brinstar. In the remake Metroid: Zero Mission, the room's appearance has been significantly changed and Mini-Kraid has been removed. It is now a larger, single chamber that connects to multiple other rooms and consists of purple architecture, with large cacti and ruins visible in the background. The drain drops Samus into a short shaft that is blocked off by an impenetrable Chozo Block with the Space Jump's symbol on it. Samus can lay a Bomb in the floor directly beside it to drop through a short tunnel and Pit Block into the rest of the room.
The bottom floor is a small corridor with the middle of the floor raised. On either side of it is an Air Hole that spawns two Geegas at once. Numerous Zeelas are also found in the room, crawling along the walls and ceiling. A door on the right leads into an Unknown Item's chamber, but another Chozo Block in that room prevents Samus from accessing it that way. A midair platform directly in front of this door allows Samus access to a Morph Ball tunnel in the ceiling, which is obstructed by a Fake Block to the right and another Chozo Block directly above the raised floor, with two Missile Blocks underneath that. Samus can shoot the Fake Block and roll through the tunnel into the Unknown Item chamber to collect the item and render the Chozo Blocks destructible. After this, she can remove the Chozo Block in the tunnel of this room and follow it along to reach the "cactus path", which leads deeper into Kraid.
|
Items
|
Connecting rooms
|
Save Room 3[]
"Save Room 3" is the third Save Room in Kraid. It can be accessed from the left of "Mini-Kraid's room".
|
Items
|
Connecting rooms
|
Unknown Item chamber[]

The "Unknown Item chamber" can be accessed from the left of "Mini-Kraid's room". It is a small room with a ledge on the right wall, atop which is a jagged and menacing looking Chozo Statue holding an Item Sphere. If Samus enters the room through the door, she will be unable to access the item as an impenetrable Chozo Block is in her way. She must enter the chamber through a tunnel in the ceiling of the previous room, where she will drop behind the Chozo Block via a Pit Block. Once she collects the Unknown Item (later revealed to be the Space Jump) she can shoot the Chozo Block and leave the room normally.
|
Items
|
Connecting rooms
|
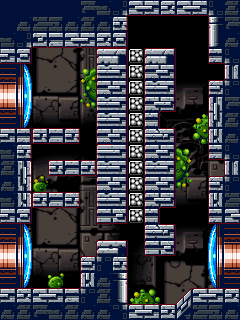
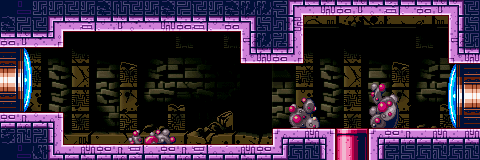
Cactus path[]


Full view.
The "cactus path" is a new room that did not exist in Metroid. It is a long, bright green corridor filled with scores of a large, bulbous purple cacti in the background (hence the name), as well as brick walls. Along the corridor are four midair platforms consisting of three blocks each. The cactus path is inhabited by six Reos and five Sidehoppers. This connects from "Mini-Kraid's room" to the fourth Save Room in Kraid.
|
Items
|
Connecting rooms
|
Save Room 4[]
"Save Room 4" is the fourth Save Room in Kraid. It can be accessed from the left of the cactus path, not long after the third Save Room. This is the last one before Kraid. It is the only Save Room in Kraid to not have a partially sloped floor, as both its doors are on higher ledges.
|
Items
|
Connecting rooms
|
Hidden drop[]

The "hidden drop" is a small room connecting between two other tiny chambers and a larger one. It is comprised of green tiles, which appear to be frayed. A cracked block in the floor can be destroyed with a Bomb to expose a secret tunnel drop (hence the name) leading into Kraid's slope. This drops Samus right in between the two Chozo Blocks in that room, which guard the door leading to Kraid's room.
See here for the room's equivalent in Metroid.
|
Items
|
Connecting rooms
|
Replenishment station[]
Full view.
The "replenishment station" is a short, two floor shaft on the eastern side of Kraid. When entered, it initially appears as a small room with an Air Hole in the floor and a midair platform above it. Two Zeelas encircle the platform, while the Air Hole infinitely spawns Geegas, two at a time. Samus can repeatedly shoot these to replenish her Energy Meter and Missile Ammo, and it is her last chance to do so before the fight with Kraid. If she stands on the platform and shoots upward, she will expose a hidden tunnel in the "ceiling" leading to an upper floor. This portion of the room leads back to the Lair's entrance shaft.
See here for the room's equivalent in Metroid.
|
Items
|
Connecting rooms
|
Ramp[]

The "ramp" is a simple room in between the upper part of the replenishment station and the Pit Block shaft. As the name implies, its sole notable feature is a slight incline in the floor and ceiling, giving the room a "zigzagging" appearance.
See here for the room's equivalent in Metroid.
|
Items
|
Connecting rooms
|
Pit Block shaft[]

Full view.
The "Pit Block shaft" is a small shaft and an optional room. It is divided in half by a large wall, which has several ledges along its right side that can be grabbed to climb it. Near its top is a blockage that can be destroyed with beam shots. Once Samus gets atop the wall, she will fall through a chain of Pit Blocks to a group of Bomb Blocks, which she can destroy to get to the other side of the wall. Here, there are two doors connecting to two other rooms, with ledges and a Missile Block separating the two. There are two Zeelas in this room. The destructible blocks will respawn on later visits.
See here for the room's equivalent in Metroid.
|
Items
|
Connecting rooms
|
Ball launcher speedway[]
The "ball launcher speedway" is a room in Kraid. It appears, with significant differences between versions, in Metroid and Metroid: Zero Mission. In Zero Mission, the room's appearance has been significantly changed, but it remains an optional route to Kraid. Like much of Kraid's Lair, its walls are now purple. The acid has been removed, but the floor now has a large pit in between two raised floors. Above the pit is the Missile Tank, contained in between a line of Pit Blocks and a zip line on the ceiling. The zip line is blocked by three Boost Block barricades on the ceiling, which can be destroyed by using Morph Ball launchers hidden in the floor directly under each barricade. The launchers themselves are under Bomb Blocks. A fourth Morph Ball launcher can be found further to the right, which launches Samus up to the zip line. It will automatically carry her to the left, and she will collect the Missile Tank along the way, before dropping through the Pit Blocks back into the pit below.
|
Items |
Connecting rooms
|
Divided alcove[]
The "divided alcove" is a small room connecting between the main shaft of Kraid and a smaller shaft leading to the lair's depths. It has a zip line on the ceiling with a switch to summon the mechanism on either side. A T-shaped structure is present in the middle of the room, as are two pillars on either side. Samus cannot simply jump up to the T-shaped structure and roll to the other side, as its ledges are made of Pit Blocks. She therefore must use the zip line to get across. The two other pillars are made of Bomb Blocks.
See here for the room's equivalent in Metroid.
|
Items
|
Connecting rooms
|
Sidehopper infested hall[]
Full view.
The "Sidehopper infested hall" is a short corridor found on the bottom right of the entrance shaft. It leads toward the Map Room. It is inhabited by five Sidehoppers, and has an Air Hole that spawns infinite Geegas two at a time. These can be used to replenish Samus's energy and Missile Ammo after defeating the Sidehoppers.
See here for the room's equivalent in Metroid.
|
Items
|
Connecting rooms
|
Pipe shaft[]

Full view.
The "pipe shaft" is a short shaft on the lower west side of Kraid. It connects to the Map Room and the upper half to Kraid's gauntlet. In the center of the shaft is a large glass tube held in place by barriers. To ascend the shaft, Samus must use a Morph Ball launcher in the floor, which will shoot her through the tube to the top. As with the apex launcher shaft, an etching hinting at the launcher is located directly next to it. The shaft is inhabited by 6 Zeelas and 8 Rippers, several of which are inside the pipe.
See here for the room's equivalent in Metroid.
|
Items
|
Connecting rooms
|
Map Room[]
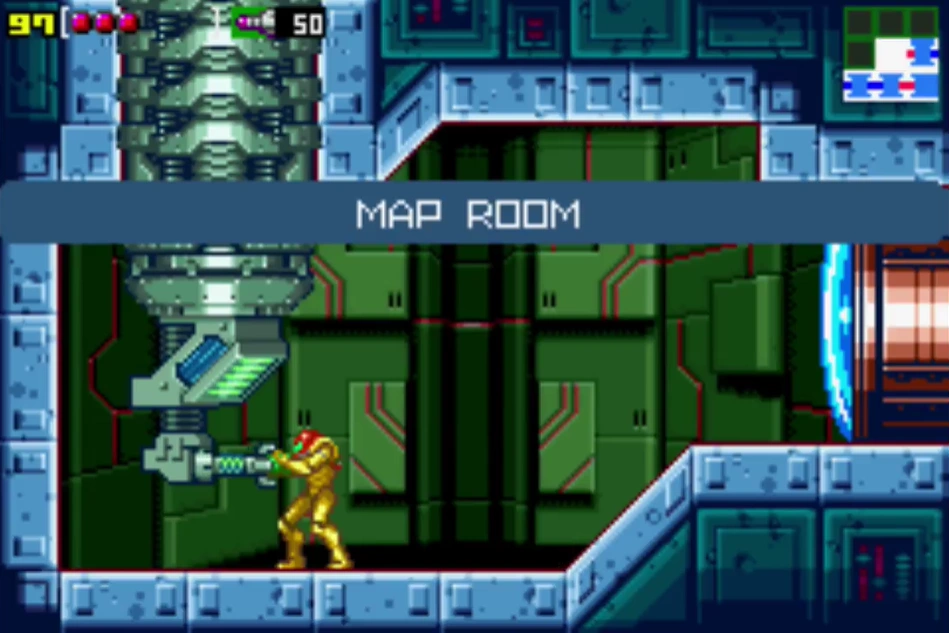

The Map Room provides Samus with an opportunity to download a map of Kraid. It is only accessible from the pipe shaft. When downloaded, the map reveals rooms such as the corrosive pool, Kraid's gauntlet and the upper part of the pipe shaft. It does not reveal any secret rooms or those leading directly to Kraid beyond the hidden drop and replenishment station.
|
Items
|
Connecting rooms
|
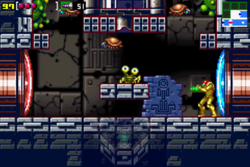
Kraid's gauntlet[]
"Kraid's gauntlet" is a room in Kraid. It appears, with significant differences between versions, in Metroid and Metroid: Zero Mission. In Zero Mission, this room's appearance has been changed entirely with the increased memory size offered by the Game Boy Advance. It is now a pit with steep ledges leading to two doors on both sides. Samus can enter this room from either of two shafts after the ancient Chozo machine is activated, but visiting it is optional. At the base of the pit are three Sidehoppers, which can be ignored but may pose a nuisance. Near the right entrance is a walkway of Pit Blocks, next to a solid platform with a zip line sensor. It is easy to distinguish the fake platforms from solid as the fake platforms are constructed out of grid-like blocks.
Samus must climb up to the solid platform using two smaller ones directly above the pit, and shoot or Bomb the sensor. She can then quickly jump up to the zip line rail and ride it to the left. It will bring her over three midair pillars of collapsing blocks, between which is a Missile Tank. To collect it, Samus must simply disengage from the zip line when she passes over the blocks and fall into it. She will then fall into the pit below and be able to leave.
|
Items |
Connecting rooms
|
Kraid's slope[]
"Kraid's slope" is a room in Kraid. It appears, with significant differences between versions, in Metroid and Metroid: Zero Mission. In Zero Mission, the room's appearance has been updated to differentiate it from other corridors. It is much larger and now found on a steep incline. A secret passage in the floor of the chamber above can be used to gain access to this room through the ceiling. Two large, elongated midair platforms are found here, and the room is infested with Zeelas. Part of the ceiling appears to be made from scaffolding. As Samus drops through the ceiling, she can fire at two Chozo Blocks on either side of her. These block the door to Kraid's access room, and the boss himself. After the battle, Samus can return to the slope this way, or through a tunnel underneath, which is obstructed by Boost Blocks. If Samus chooses not to collect the Speed Booster, a hidden vent above the Boost Blocks will allow her to get past them and back into the slope room. Using the Speed Booster, Samus can race up the slope and preserve a Shinespark into the next shaft.
|
Items
|
Connecting rooms
|
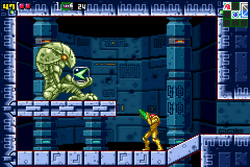
Kraid's room access[]
"Kraid's room access" is a room in Kraid's Lair/Kraid. It appears, with differences between versions, in Metroid and Metroid: Zero Mission. A separate version of this room appears in Super Metroid. In Zero Mission, the room has been slightly enlarged vertically, and shrunken in width. Its floor and ceiling now have a slight incline beside each door, but the room retains its bridge over acid and green architecture. A Gadora now guards the entrance to Kraid's room, and must be killed to access the boss. Geegas no longer spawn here, and the entrance from the "hidden drop" has been removed, since that room now leads into the slope beside this one. When Samus defeats Kraid, she has the option to collect the Speed Booster and use it to run back through a lower passage in this room, breaking through a wall of Boost Blocks in the slope room. If she does not collect the Booster, she can still use this path, but will need to find a hidden tunnel in the ceiling above the Boost Blocks.
|
Items
|
Connecting rooms
|
Kraid's room[]
Kraid's room is the room where Kraid is battled in his lair. The chamber is different between its appearances in Metroid and Metroid: Zero Mission, and Super Metroid. In the remake Metroid: Zero Mission, Kraid's chamber is found in the same place as the original game, but its design has been thoroughly overhauled. The room is constructed from sand-red blocks, with dark red rock formations in the background. There is no longer acid or any other hazard in this room, not counting Kraid himself.
When Samus Aran first enters the arena, she is able to stand on a number of large blocks on the right side of the chamber, letting her easily jump and shoot at Kraid. Alternatively, she can use the Power Grip to grab onto a block directly above the door, giving her maneuverability to dodge Kraid's attacks. However, as the battle continues, Kraid destroys most of the large blocks with his stomach spikes, making it difficult for Samus to find a position to shoot Kraid's head. When Kraid is defeated, the arena shakes and small rocks fall from the ceiling as Kraid sinks into the floor, suggesting that the room is partially collapsing, which may be an explanation for why Kraid seemingly disappears after the fight.
|
Items
|
Connecting rooms
|
Kraid's reliquary[]
"Kraid's reliquary" is an unnamed room in Kraid and Brinstar. Two different versions appear in Super Metroid and Metroid: Zero Mission. In Zero Mission, the room appears as a simple blue chamber not unlike that of other item rooms. A difference is that there is a slight slope in the floor, which aids in building up speed to leave Kraid's room. It is accessible by destroying a small Bomb Block obstruction at the base of the wall behind Kraid. In the background of this room are two flat-sided pillars with Chozo markings, and a paneled wall behind them with more symbols. A Chozo Statue is positioned on a platform slightly above Samus, held up by two pedestals. The Item Sphere in its hands contain the Speed Booster. After it is collected, Samus can morph in the statue's hands to replenish her energy and Missile Ammo.
|
Items |
Connecting rooms
|
Block column shaft[]
The "Block column shaft" is a room in Kraid's Lair/Kraid. It appears, with differences between versions, in Metroid and Metroid: Zero Mission. In Zero Mission, the room is shorter in height, but more or less serves the same purpose. Ascending the shaft is much easier now given the addition of the Wall Jump. Additionally, Fake Blocks no longer damage Samus: when she stands where a block will regenerate, it will repeatedly re-form and then break, and continue doing so until she moves from her position, when it will re-form fully. Assuming Samus collected the Speed Booster, she can also run into this room from the steep slope at the base of the lair, through a barricade near the bottom, and Shinespark up through the block column.
|
Items
|
Connecting rooms
|
Save Room 5[]
"Save Room 5" is the fifth and final Save Room in Kraid. It can be accessed from the top right of the block column shaft, and is useful after the battle with Kraid. The wall to the right partially consists of Screw Attack Blocks. When Samus obtains the upgrade, she can break through the wall to access a secret shortcut to Norfair.
|
Items
|
Connecting rooms
|
Acid fall[]
The "acid fall" is a room in Kraid. It appears, with significant differences between versions, in Metroid and Metroid: Zero Mission. In Zero Mission, the room's appearance has changed drastically. It is now longer and made of purple architecture, with a single pool of acid. A waterfall of acid also flows into here from the corridor above. It is possible for Samus to fall into this room via the waterfall (much like Maridia's quicksand falls in Super Metroid), which also slows her movement, and if she does not have the Varia Suit, damages her. The fall flows into the acid pool and is surrouned by a total of seven midair pillars, three of which have Zeelas crawling on them. The pillars lead to a sloped ledge on the left, with a Missile Tank embedded in the corner of the wall.
On the right side of the room is more dry land, a large platform with an Air Hole that spawns Geegas two at a time, and a larger slope. The slope is ideal for running until the Speed Booster activates. Samus can then quickly exit into the adjacent shaft, jumping up to the "corrosive pool's" door and Shinesparking in to get through that room faster.
|
Items |
Connecting rooms
|
Corrosive pool[]

The "corrosive pool" is a room in Kraid. It appears, with significant differences between versions, in Metroid and Metroid: Zero Mission. In Zero Mission, the room's appearance and role have changed significantly. It is much longer in length and cannot be fully explored until after Unknown Item 2 (the Space Jump) has been obtained and the ancient Chozo machine has been reactivated. The corridor consists of two parts: a dry platform with a narrow passage through which the Morph Ball can fit, and a long basin filled with acid. A Chozo Block obstructs the narrow passage, which cannot be removed until Samus has the item. After defeating Kraid, Samus can return to the main shaft through this room. She can use a zip line on the ceiling, or alternatively Shinespark through the room if she quickly runs in from the corridor below with her Speed Booster charged. Should Samus fall into the acid, she will fall into the room below through a secret flowing waterfall of the substance. All enemies in the room have been replaced by a swarm of Reos, which follow Samus if she does not engage them, until she reaches the narrow passage. The Reo's positions change depending on whether Kraid was defeated or not.
|
Items
|
Connecting rooms
|
Acid-filled runway[]
The "acid-filled runway" is a room in Kraid. It appears, with significant differences between versions, in Metroid and Metroid: Zero Mission. In Zero Mission, this room's appearance has been significantly changed. It can be accessed at any time, but the Energy Tank cannot now be obtained without the Speed Booster as it is covered by a Boost Block barrier. Similar to other rooms in the redesigned Kraid area, decaying ruins and large cactus-like plants can be seen in the background. Acid fills the entire room, including under dry land, although it is not dangerous if Samus has the Varia Suit. To collect it, Samus must start running from the entrance to the room until her Speed Booster activates. She will run down a slight incline and across a bridge of Pit Blocks over the acid, and must quickly Spin Jump off the bridge. If successful, she will penetrate the Boost Blocks and collect the tank. She can also Shinespark to the right from the top of the incline. Four Reos are found above the bridge and will swarm Samus as she moves, but they are easily killed by the Speed Booster. After obtaining the tank, Samus can shoot a red button above her to call a zip line to her side, and ride it back to dry land.
|
Items |
Connecting rooms
|
Norfair tunnel[]

The "Norfair tunnel" is a secret tunnel in Kraid. It did not exist in Metroid. It can be accessed from the fifth Save Room when Samus has obtained the Screw Attack, and is a simple path leading into Norfair. This is the quickest route to the lava-filled passage after the Gravity Suit has been activated.
|
Items
|
Connecting rooms
|
References[]
- ^ Metroid: Zero Mission: The Official Nintendo Player's Guide, pg. 46: 087 DROP INTO THE DRAIN - "Two rooms into the long lower corridor, you'll find a weak block in the floor. It covers a dark, narrow passage. Plant a bomb to break the block, and fall into the lair's lower region."