(→Trivia) |
No edit summary |
||
| (12 intermediate revisions by 4 users not shown) | |||
| Line 1: | Line 1: | ||
{{Translated Name|Japanese}} |
{{Translated Name|Japanese}} |
||
| + | {{Infobox Room |
||
| − | [[File:Biosphere_Swamp_HD.jpg|thumb|300px|The room upon entrance.]] |
||
| + | |name=Swamp Zone |
||
| − | |||
| + | |image=Biosphere_Swamp_HD.jpg |
||
| − | The '''Swamp Zone''' is a room in the [[Biosphere]]. It appears in ''[[Metroid: Other M]]''. |
||
| + | |caption=The room upon entrance. |
||
| + | |game=''[[Metroid: Other M]]'' |
||
| + | |planet/ship=[[BOTTLE SHIP]] |
||
| + | |area=[[Sector 1 / Biosphere]] |
||
| + | |notable features=[[Holographic Generator]] |
||
| + | |significance= |
||
| + | |enemies/wildlife=[[Geemer]]s, [[Poison Gripper]]s, [[Groganch]] |
||
| + | }} |
||
| + | The '''{{Nihongo|Swamp Zone|湿地帯}}'''<ref>[[Gallery Mode]], [http://www.metroid-database.com/old_site/mom/artwork/gallery/english/momart27-biosphere.png translated] by [[Metroid Database]]</ref>, also called '''Experiment Floor 2'''<ref>''[[Metroid: Other M Premiere Edition]]''</ref>, is a room in [[Sector 1 / Biosphere]]. It appears in ''[[Metroid: Other M]]''. |
||
==Description== |
==Description== |
||
| − | Upon entrance, the room initially is a marsh-like area with constant rainfall. Throughout the room are |
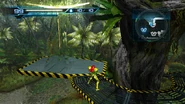
+ | <onlyinclude>Upon entrance, the room initially is a marsh-like area with constant rainfall. Throughout the room are trees featuring cylinder-shaped gratings with no bottom, and platforms with [[Grab Ledge]]s that [[Samus]] must traverse to move on through the room. Although there are many of these and much of them are unreachable, placed to confuse Samus, the platforms she must first use are located towards the back of the room.</onlyinclude> The platforms lead to a [[Morph Ball]] tunnel, which is blocked off by two [[Geemer]]s that must be killed with [[Bomb]]s. The tunnel ends at a platform and leads to another, which features another tunnel. Samus must climb two more platforms before she can access another tunnel, and thus another series of platforms and tunnels, until she reaches a [[Holographic Generator]]. |
| − | After activating the generator, the rainfall and background of vegetation disappears, revealing the room to be an indoor facility, although the marsh ground still exists. The trees become intertwined with colors of black and light blue, resembling |
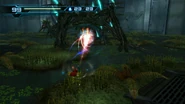
+ | After activating the generator, the rainfall and background of vegetation disappears, revealing the room to be an indoor facility, although the marsh ground still exists. The trees become intertwined with colors of black and light blue, resembling [[piston]]s found in the [[Proving Grounds]] room during ''[[Metroid Prime 3: Corruption]]''. A [[Groganch]], the first of three that Samus encounters, exposes itself, and forces Samus into a battle. |
The death of the Groganch results in a gate lifting to allow Samus access to a [[Kick Climb]] shaft, and the [[Door]] out of the room unlocks. There is an observation window that Samus enters, but she is forced to battle a trio of [[Griptian]]s. |
The death of the Groganch results in a gate lifting to allow Samus access to a [[Kick Climb]] shaft, and the [[Door]] out of the room unlocks. There is an observation window that Samus enters, but she is forced to battle a trio of [[Griptian]]s. |
||
| + | |||
| + | ==Connecting rooms== |
||
| + | *[[Water-filled room (Biosphere)|Water-filled room]] (via [[automatic door]]) |
||
| + | *[[List of rooms in Metroid: Other M/Biosphere#Navigation Booth F|Navigation Booth F]] (via automatic door) |
||
==Inhabitants== |
==Inhabitants== |
||
| − | *5 [[ |
+ | *5 [[Geemer]]s |
*[[Poison Gripper]]s |
*[[Poison Gripper]]s |
||
*[[Groganch]] |
*[[Groganch]] |
||
| + | *3 [[Griptian]]s (observation window) |
||
==Items== |
==Items== |
||
| Line 26: | Line 40: | ||
==Gallery== |
==Gallery== |
||
<gallery> |
<gallery> |
||
| + | File:Biosphere.jpg|[[Gallery Mode]] |
||
File:Plant_Creature_MOM.PNG|Samus battles the Groganch. |
File:Plant_Creature_MOM.PNG|Samus battles the Groganch. |
||
| − | File:Biosphere.jpg|The concept artwork that names this room.[http://www.metroid-database.com/mom/artwork/gallery/english/momart27-biosphere.png] |
||
File:Forest.jpg|The room's Holographic Generator. |
File:Forest.jpg|The room's Holographic Generator. |
||
</gallery> |
</gallery> |
||
| + | |||
| + | ==References== |
||
| + | {{reflist}} |
||
| + | {{BOTTLE SHIP}} |
||
| + | |||
[[ru:Зона болот]] |
[[ru:Зона болот]] |
||
[[Category:Rooms]] |
[[Category:Rooms]] |
||
[[Category:Biosphere]] |
[[Category:Biosphere]] |
||
[[Category:Boss Rooms]] |
[[Category:Boss Rooms]] |
||
| + | [[Category:Rooms containing expansion(s) in Metroid: Other M]] |
||
Revision as of 22:01, 5 July 2020
This article's name is an unofficial translation from official Japanese media
and may not represent the canonical English name, if one exists.
An alternate name from an official source may be required.
The Swamp Zone (湿地帯)[1], also called Experiment Floor 2[2], is a room in Sector 1 / Biosphere. It appears in Metroid: Other M.
Description
Upon entrance, the room initially is a marsh-like area with constant rainfall. Throughout the room are trees featuring cylinder-shaped gratings with no bottom, and platforms with Grab Ledges that Samus must traverse to move on through the room. Although there are many of these and much of them are unreachable, placed to confuse Samus, the platforms she must first use are located towards the back of the room. The platforms lead to a Morph Ball tunnel, which is blocked off by two Geemers that must be killed with Bombs. The tunnel ends at a platform and leads to another, which features another tunnel. Samus must climb two more platforms before she can access another tunnel, and thus another series of platforms and tunnels, until she reaches a Holographic Generator.
After activating the generator, the rainfall and background of vegetation disappears, revealing the room to be an indoor facility, although the marsh ground still exists. The trees become intertwined with colors of black and light blue, resembling pistons found in the Proving Grounds room during Metroid Prime 3: Corruption. A Groganch, the first of three that Samus encounters, exposes itself, and forces Samus into a battle.
The death of the Groganch results in a gate lifting to allow Samus access to a Kick Climb shaft, and the Door out of the room unlocks. There is an observation window that Samus enters, but she is forced to battle a trio of Griptians.
Connecting rooms
- Water-filled room (via automatic door)
- Navigation Booth F (via automatic door)
Inhabitants
- 5 Geemers
- Poison Grippers
- Groganch
- 3 Griptians (observation window)
Items
- Energy Part
- If Samus returns with the Space Jump, she can reach a platform beside the Swamp Zone's exit, which features a sensor. Shooting this will bring up several platforms for Samus to use (they retract after a limited period of time) and reach a ledge with the Energy Part.
Trivia
- A Stevenson screen is shown in this room in concept art, but it is not seen in-game.
- In the Gameplay Movie trailer, the Swamp Zone had a much brighter, more golden sky.
Gallery
References


